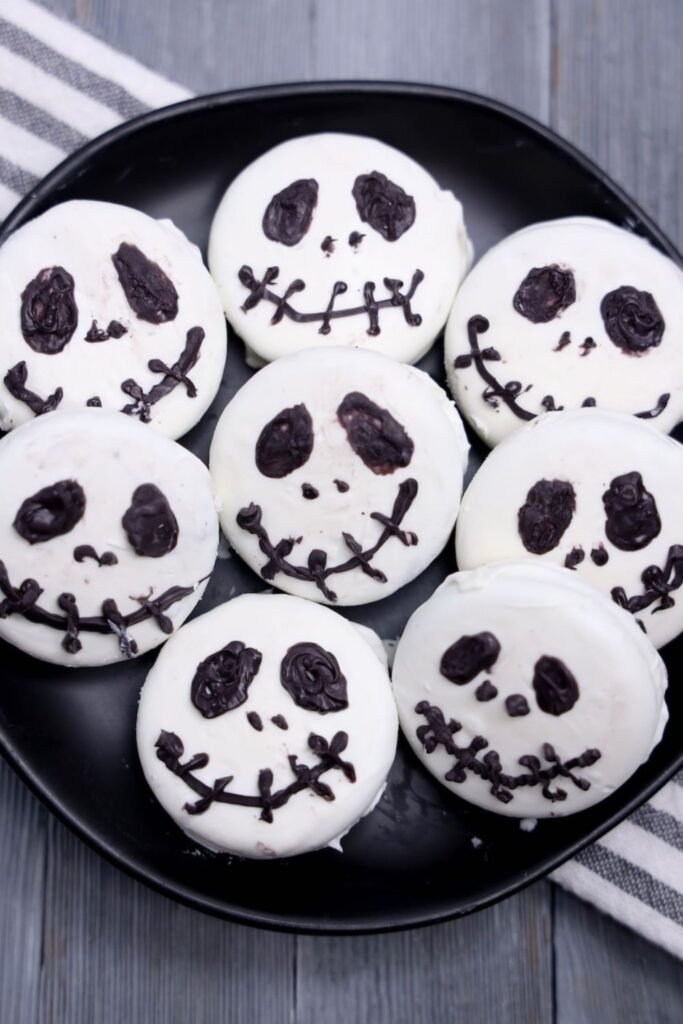
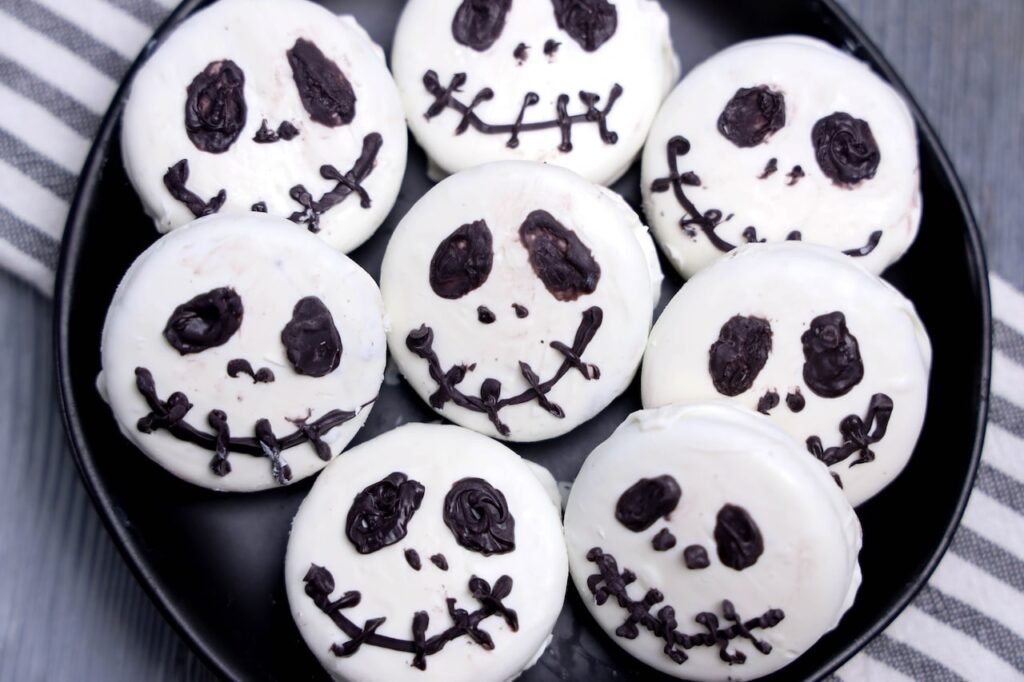
Jack Skellington Oreos
If you’re looking for a fun and easy Halloween treat, these Jack Skellington Oreos are guaranteed to be a hit. Made with Oreo cookies, creamy white chocolate, and a simple black icing design, they’re decorated to look just like everyone’s favorite Pumpkin King from The Nightmare Before Christmas. Best of all, they’re completely no-bake, making them perfect for busy fall days when you want something festive without turning on the oven.
These adorable Halloween Oreos are surprisingly easy to make, even if you’re not an experienced decorator. The simple Jack Skellington face design comes together with just a few icing lines, making this a great project for kids, family movie nights, classroom parties, or Halloween gatherings. Whether you’re hosting a Nightmare Before Christmas-themed party or simply want a cute dessert for spooky season, these chocolate-covered Oreos are as fun to make as they are to eat.
With only a handful of ingredients and minimal prep time, this easy Halloween dessert is perfect for adding a little spooky magic to your dessert table. Once you see how simple they are, you’ll want to make them year after year.
Why You’ll Love These Jack Skellington Oreos
Ingredients You’ll Need
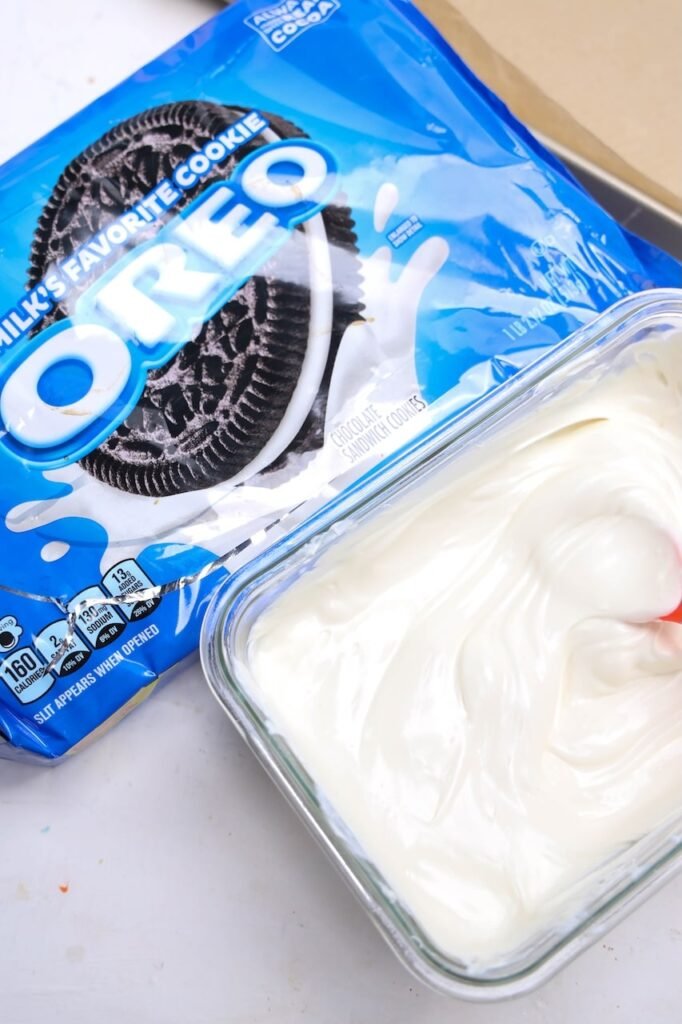
- Oreo cookies – Regular Oreo cookies work best for creating Jack Skellington’s face.
- White candy melts – Melted white candy melts create the base coating and give these cookies Jack Skellington’s signature pale appearance.
- Black candy melts – Used to pipe Jack’s eyes, nose, and stitched smile. Transfer the melted candy to a piping bag or zip-top bag for precise decorating.
Optional Supplies
- Piping bag or zip-top bag for decorating
- Parchment paper for easy cleanup
- Fork or dipping tool for coating the Oreos
How to Make Jack Skellington Oreos
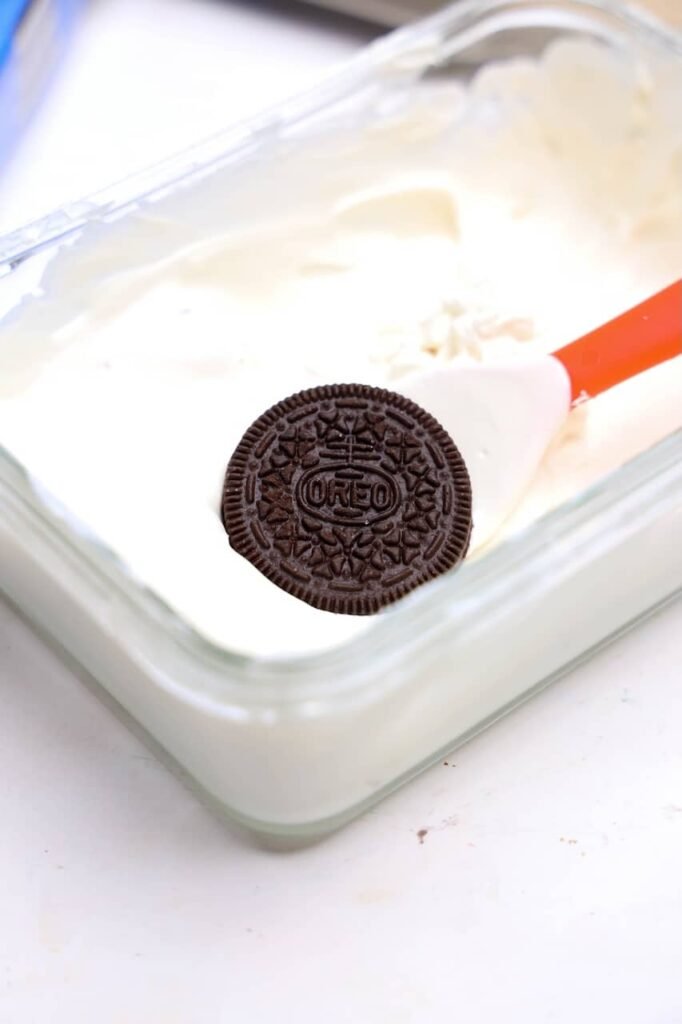
Step 1 – Melt the White Candy Melts. Place the white candy melts in a microwave-safe bowl. Microwave at 50% power on defrost mode for 2 minutes. Stir well, then continue microwaving in 1-minute intervals on defrost mode, stirring between each interval, until the candy melts are completely smooth and melted.
Step 2 – Coat the Oreos. Dip each Oreo into the melted white candy melts until fully coated. Lift the cookie out with a fork and gently tap off any excess coating. Place the coated Oreos on a parchment paper-lined baking sheet or plate.
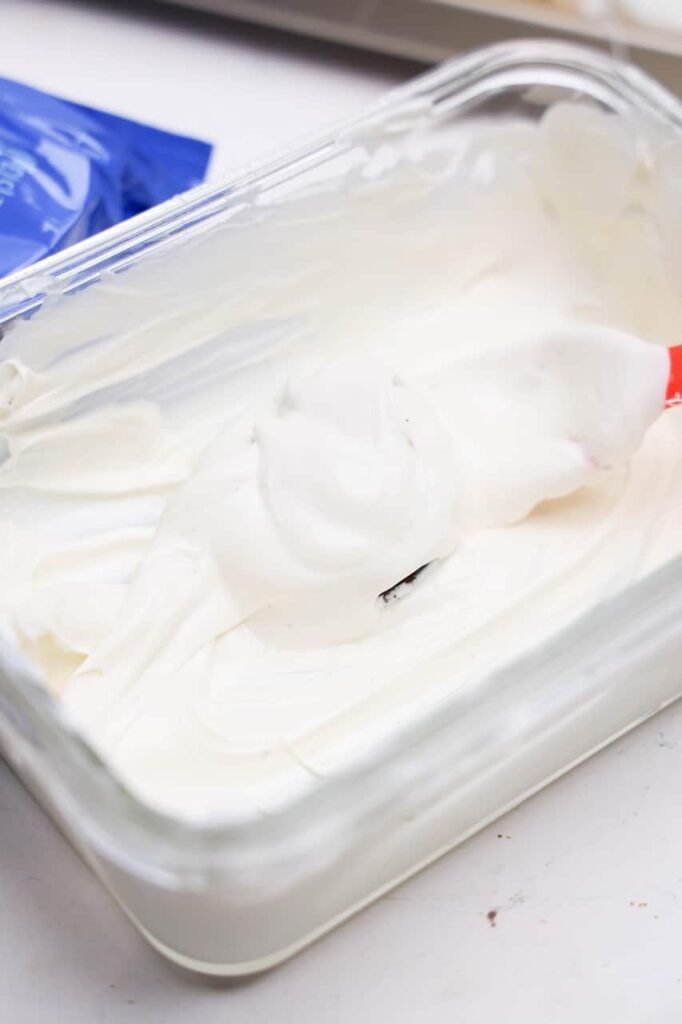
Step 3 – Let the Oreos Dry. Allow the white candy coating to dry completely before moving on to the next step. The coating should be firm to the touch so the black candy melts don’t smear during decorating.
Step 4 – Melt the Black Candy Melts. Place the black candy melts in a microwave-safe bowl. Microwave at 50% power on defrost mode for 2 minutes. Stir well, then continue microwaving in 1-minute intervals on defrost mode, stirring between each interval, until smooth and melted. Transfer the melted candy melts to a piping bag and snip a small opening at the tip.
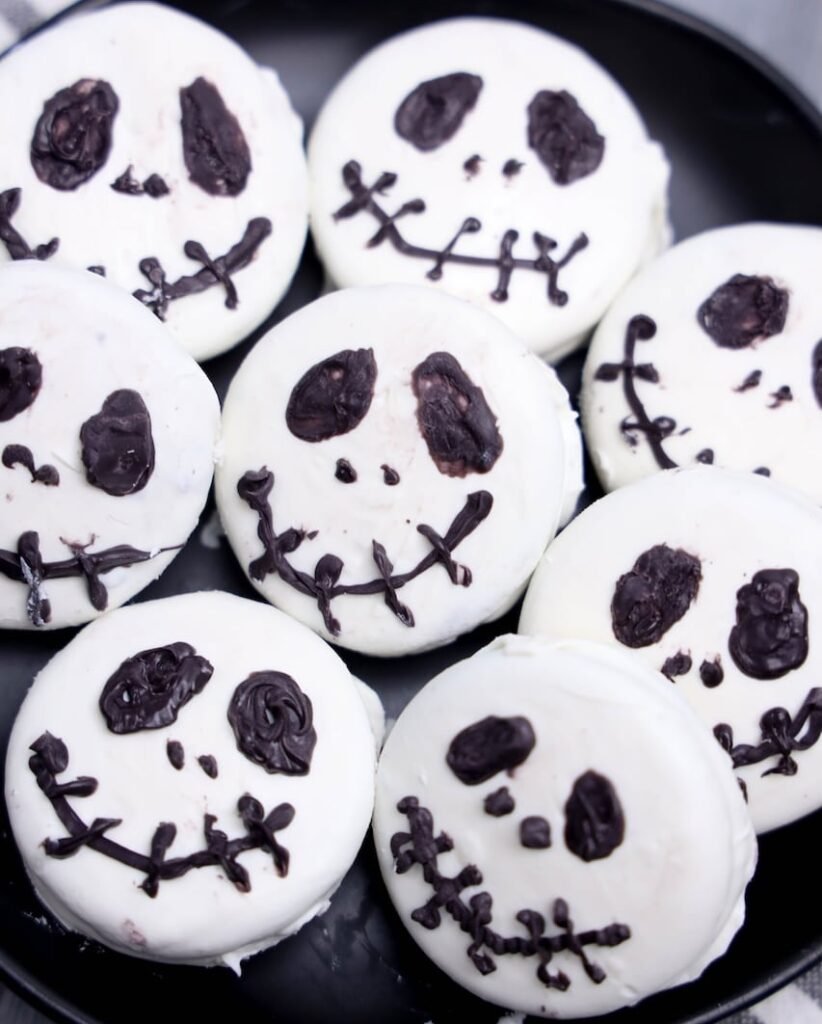
Step 5 – Draw Jack Skellington’s Face. Pipe Jack Skellington’s face onto each Oreo using the melted black candy melts. Draw two large oval eyes, add two small nostrils, and finish with his signature stitched smile.
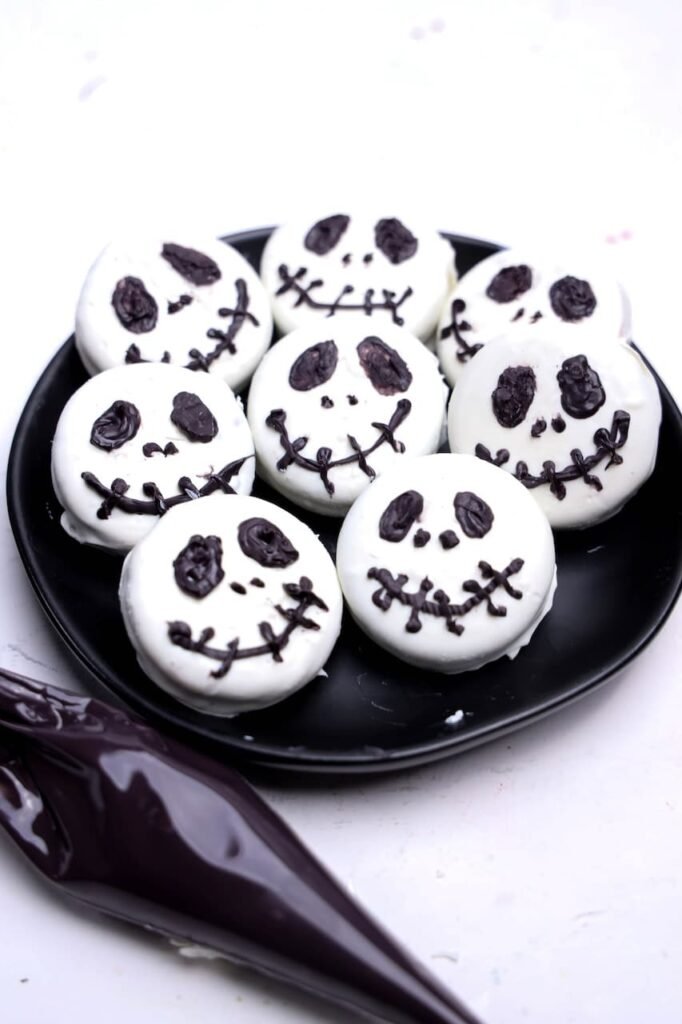
Step 6 – Serve and Enjoy. Allow the decorated Oreos to dry completely until the black candy melts have hardened. Once set, they’re ready to serve and enjoy.
Tips for Halloween Oreo treats
Make-Ahead and Storage Tips
- These Jack Skellington Oreos can be made up to 3 days in advance, making them perfect for Halloween parties and gatherings.
- Store the Oreos in an airtight container at room temperature once the candy coating has completely hardened.
- Keep them in a cool, dry place away from direct sunlight or heat to prevent the candy melts from softening.
- If stacking the Oreos, place parchment paper between layers to protect the decorations.
- For the best taste and texture, enjoy within 5 days.
- To freeze, place the Oreos in a freezer-safe container with parchment paper between layers and freeze for up to 2 months.
- Allow frozen Oreos to come to room temperature before serving.
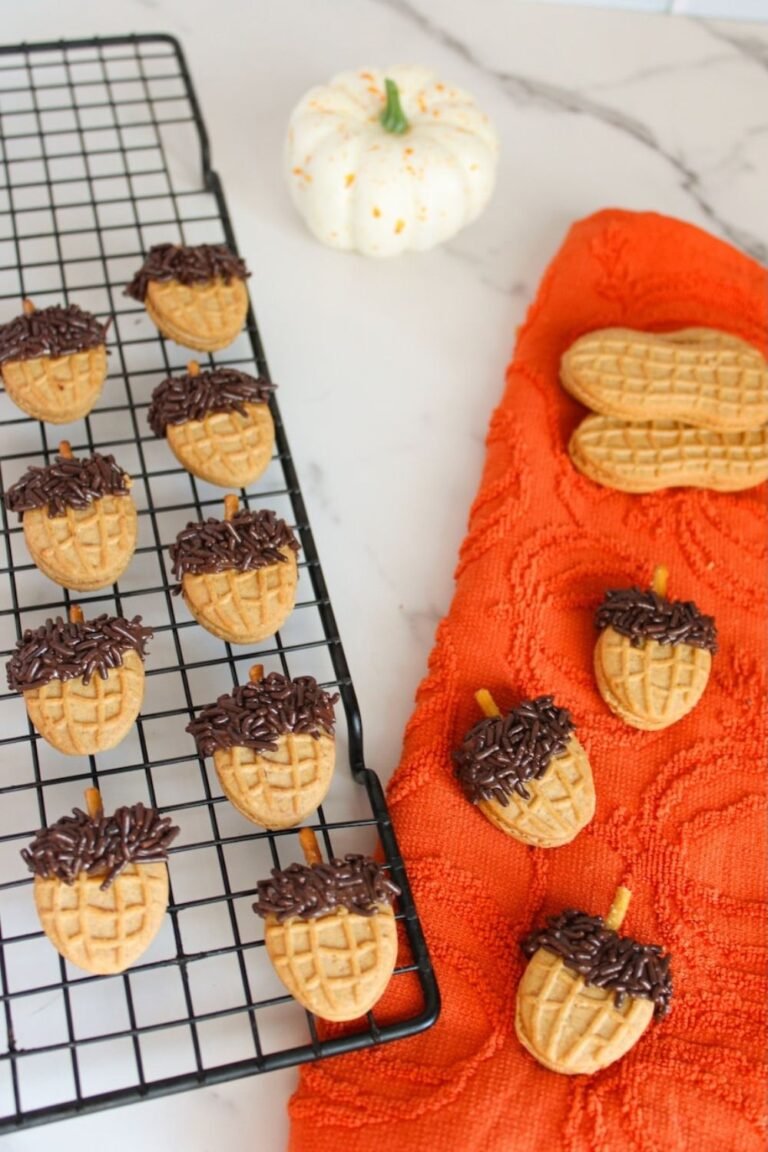
Looking for more spooky sweets? Try my Halloween candy bark for an easy crowd-pleasing dessert, make a batch of Oreo spiders for a fun kid-friendly treat, or bake some festive Halloween witch cookies. For another spooky favorite, these Frankenstein Rice Krispies Treats are always a hit at Halloween parties and fall gatherings.
Print
Jack Skellington Oreos
These easy Jack Skellington Oreos are made with Oreo cookies dipped in white candy melts and decorated with black candy melts to look like the Pumpkin King. A fun no-bake Halloween treat for parties, movie nights, and Nightmare Before Christmas fans.
- Total Time32 minutes
- Yield8 1x
Ingredients
- 8 Oreo cookies
- 12 oz white candy melts
- 6 oz black candy melts
Instructions
- Add the white candy melts to a microwave-safe bowl. Microwave at 50% power on defrost mode for 2 minutes, then stir well.
- Continue microwaving in 1-minute intervals on defrost mode, stirring between each interval, until the candy melts are smooth and fully melted.
- Dip each Oreo into the melted white candy melts until fully coated. Lift the cookie out and gently shake off any excess coating.
- Place the coated Oreos on parchment paper and let them dry completely.
- Once the white coating is dry, add the black candy melts to a microwave-safe bowl. Microwave at 50% power on defrost mode for 2 minutes, then stir well.
- Continue microwaving in 1-minute intervals on defrost mode, stirring between each interval, until smooth and melted.
- Transfer the melted black candy melts to a piping bag and snip a small opening at the tip.
- Pipe Jack Skellington’s face onto each Oreo by adding two large eyes, two small nostrils, and a stitched smile.
- Let the decorated Oreos dry completely before serving.
Notes
- Make sure the white candy coating is fully dry before adding the black details.
- If the candy melts are too thick, reheat briefly and stir until smooth.
- Snip only a tiny opening in the piping bag for better control when drawing the faces.
Nutrition
- Serving Size: 1 oreo
- Calories: 225 kcal
- Sugar: 28g
- Fat: 10g
- Saturated Fat: 8g
- Carbohydrates: 34g
- Cholesterol: 0mg
If you make this festive Halloween dessert recipe, I’d love to hear what you think! Leave a comment below and don’t forget to rate the recipe.