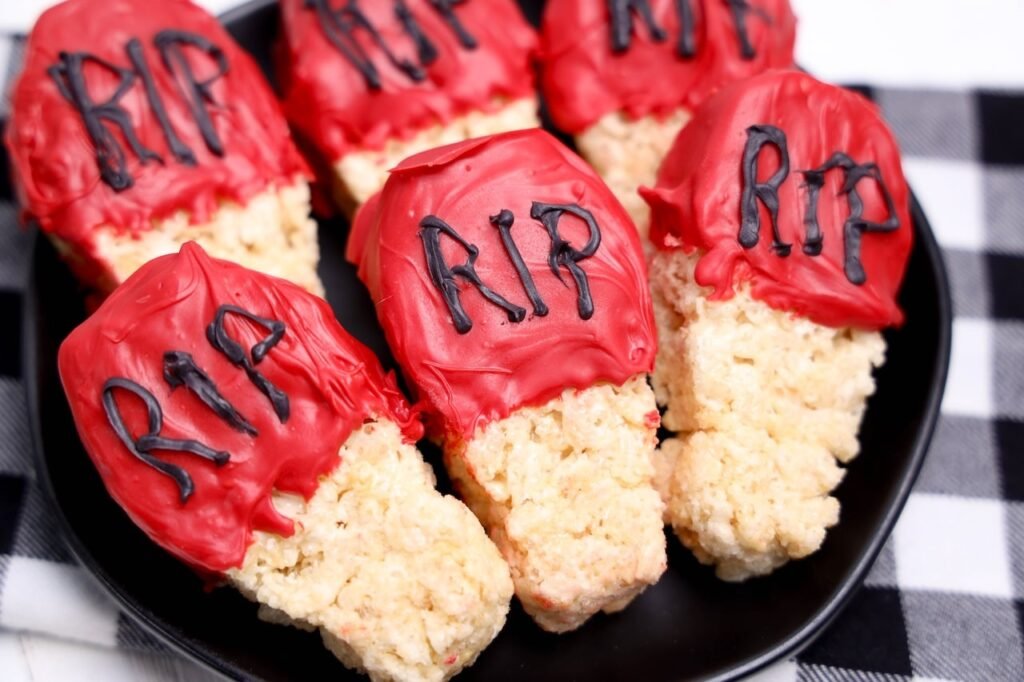
Halloween Rice Krispies Treats
These Halloween Rice Krispies Treats are an easy no-bake dessert that’s perfect for spooky season. Made with store-bought Rice Krispies Treats, red candy melts, and black candy melts, they’re transformed into fun gravestone-shaped treats with simple “RIP” decorations.
Whether you’re planning a Halloween party, classroom celebration, or festive family gathering, these spooky treats come together quickly and are guaranteed to be a crowd favorite. Best of all, you only need a few ingredients and minimal prep time to make them.
Why You’ll Love These Halloween Rice Krispies Treats
Ingredients for Coffin Rice Krispies Treats
(Scroll to the bottom of this post for the full recipe card.)
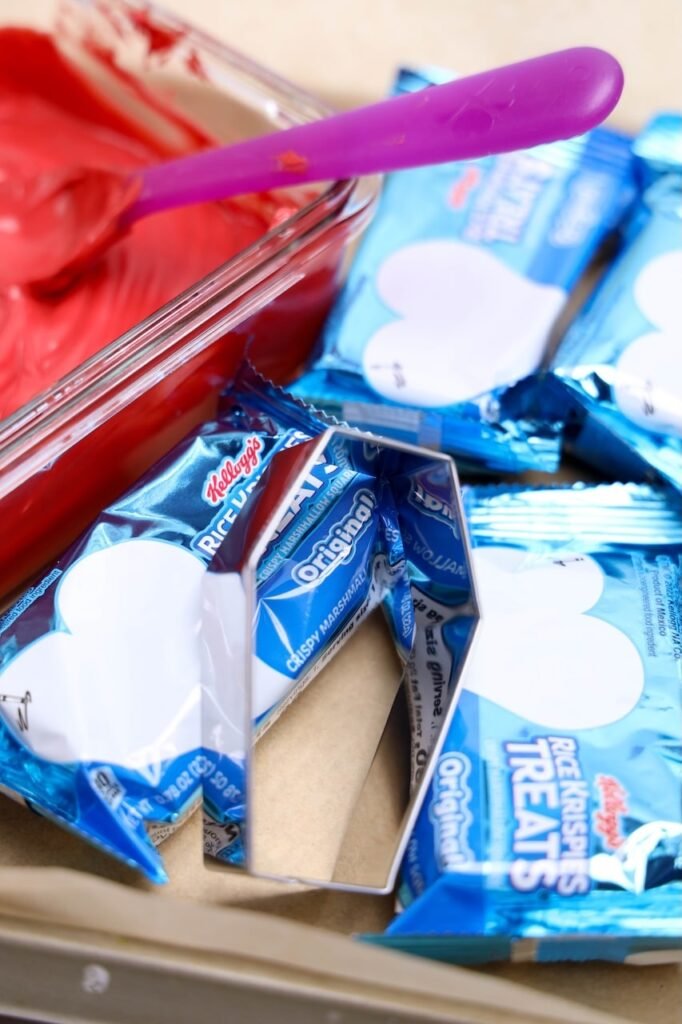
You only need 3 simple ingredients to make these festive Halloween Rice Krispies Treats:
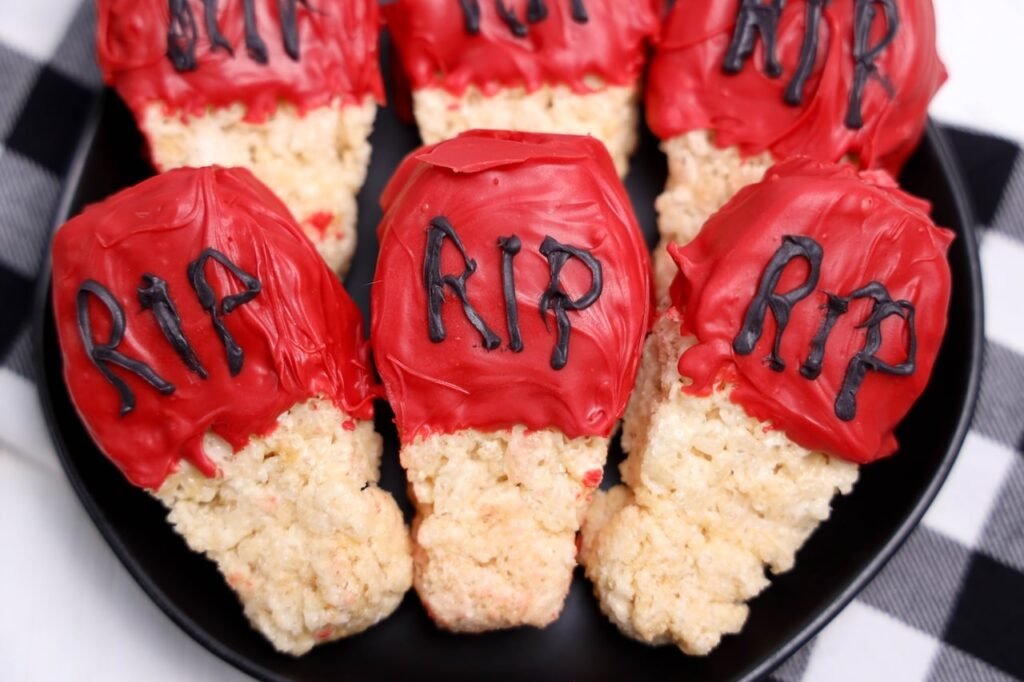
- Rice Krispies Treats – Store-bought treats make this recipe quick and easy.
- Red candy melts – Melted red candy melts create a smooth coating and give these treats their spooky Halloween look.
- Black candy melts – Use melted black candy melts to drizzle over the treats for a fun Halloween design.
How to Make Halloween Rice Krispies Treats
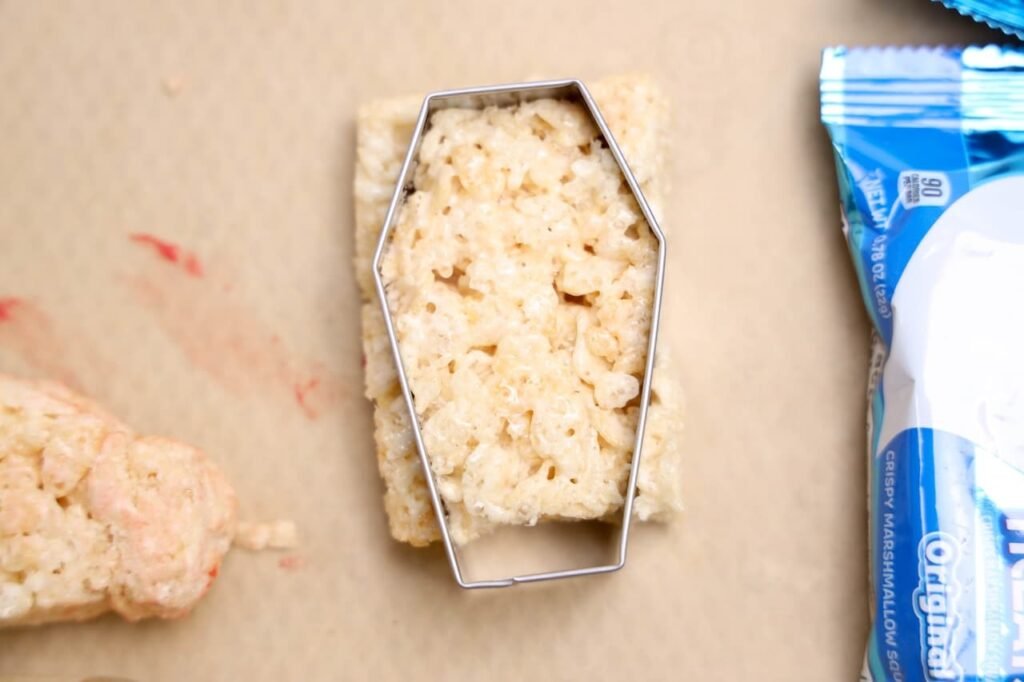
- Unwrap the Rice Krispies Treats and cut them into coffin shapes using a cookie cutter or a sharp knife.
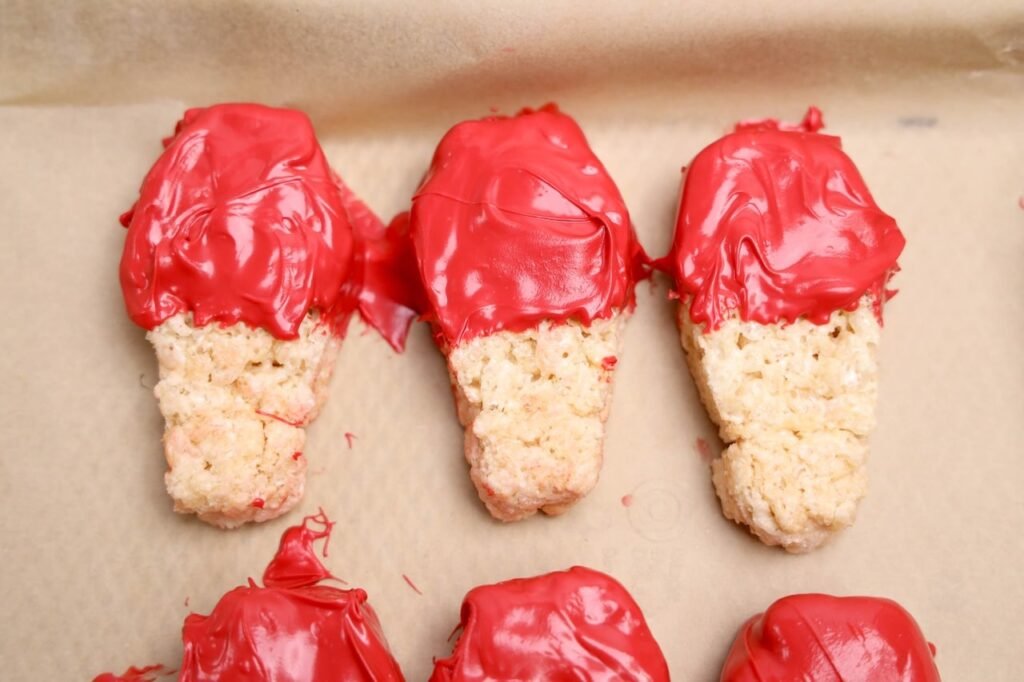
2. Melt the red candy melts in a microwave-safe bowl, heating in 30-second intervals until smooth. Dip each coffin halfway into the melted red coating, let the excess drip off, and place on a parchment-lined baking sheet. Freeze for 10 minutes to set.
3. While the red coating hardens, melt the black candy melts in a microwave-safe piping bag or zip-top bag. Snip the tip to create a small opening.
4. Pipe the letters “RIP” onto each coffin. You can also add crosses, spiderwebs, or outlines for extra decoration.

Tips for Making This No-bake Halloween Dessert
Make-Ahead and Storage Tips
- Make them in advance. These treats can be prepared 1 to 2 days before your Halloween party or event.
- Store at room temperature. Place the treats in an airtight container and keep them in a cool, dry place away from direct sunlight and heat.
- Separate layers if needed. If stacking the treats, place a sheet of parchment or wax paper between layers to protect the decorations.
- Avoid refrigeration. Refrigerating the treats can cause condensation to form on the candy coating, which may affect their appearance and texture.
- Enjoy within 3 to 5 days. For the best flavor and texture, serve the treats within a few days of making them.
Looking for more fun Halloween treats? Be sure to check out my spooky Frankenstein Rice Krispies Treats, which are just as festive and perfect for classroom parties. For an easy no-bake dessert, my Halloween Oreo eyeballs are always a crowd favorite, while Halloween candy bark is a great way to use up extra Halloween candy.
Print
Halloween Rice Krispies Treats
Whip up these spooky Halloween Rice Krispies Treats in minutes! With red candy coating, black icing, and a creepy “RIP” topper, they make a fun, kid-approved treat for your Halloween dessert table.
- Total Time16 minutes
- Yield6 1x
Ingredients
- 6 Rice Krispies Treats
- 3 oz black candy melts
- 12 oz red candy melts
- Optional: coffin-shaped cookie cutter, parchment paper, candy eyes, Halloween sprinkles
Instructions
- Line a baking sheet or large plate with parchment paper and unwrap the Rice Krispies Treats.
- Place the red candy melts in a microwave-safe bowl and heat in 30-second intervals, stirring between each interval until smooth.
- Dip the top portion of each Rice Krispies Treat into the melted red candy melts, allowing any excess coating to drip off.
- Place the coated treats on the prepared parchment paper and allow the candy coating to set slightly.
- Melt the black candy melts according to package directions and transfer them to a piping bag or zip-top bag with a small corner snipped off.
- Pipe the letters “RIP” onto the red candy coating to resemble spooky gravestones.
- Allow the candy melts to fully harden before serving.
Notes
- Do not overheat the candy melts, as they can become thick and difficult to work with.
- For best results, allow the red coating to set for a few minutes before piping the black lettering.
- Add Halloween sprinkles or candy eyes for a different festive look.
Nutrition
- Serving Size: 1 treat
- Calories: 350 kcal
- Sodium: 160 mg
- Fat: 14 g
- Saturated Fat: 11 g
- Carbohydrates: 53 g
- Protein: 3 g
- Cholesterol: 0 mg
Did you make these Halloween Rice Krispies Treats? Leave a comment below and let me know. If you enjoyed this recipe, please give it a 5-star rating.