Christmas Melted Snowman Cookies
I first saw a version of these melted snowman cookies online a few years ago and thought they were just the cutest thing. Of course, I couldn’t resist making my own twist, something a little simpler, a little more “Nana-style,” so I could bake them with my grandkids.
We turned it into a mini holiday project one snowy afternoon. The kids loved giving each snowman a different face, some smiling, some looking a little shocked that they were melting away! It was messy, funny, and full of giggles, and now it’s become one of our favorite Christmas traditions.
Why You’ll Love These Melted Snowman Cookies
If you’ve ever wanted a Christmas cookie that earns instant smiles, this is it.
Here’s why these little guys are always a hit:
- Kid-friendly fun: No fancy piping or royal icing skills required — just spread, stick, and decorate.
- Make-ahead easy: Both dough and icing can be prepped in advance, and the cookies freeze beautifully.
- Customizable: Swap in gluten-free flour, vegan marshmallows, or even peanut butter dough for a twist.
- Photo-ready: They look amazing on holiday trays or wrapped in cellophane for gifts.
Ingredients for Melted Snowman Cookies
This recipe keeps things quick, fun, and kid-friendly — perfect for last-minute baking days or holiday parties when you’ve already got a dozen other things in the oven.

- 1 (16.5 oz) roll sugar cookie dough
- White cookie icing (for the “melted snow”)
- Orange cookie icing (for noses)
- Black cookie icing (for eyes, mouths, buttons, arms)
- 16 large marshmallows
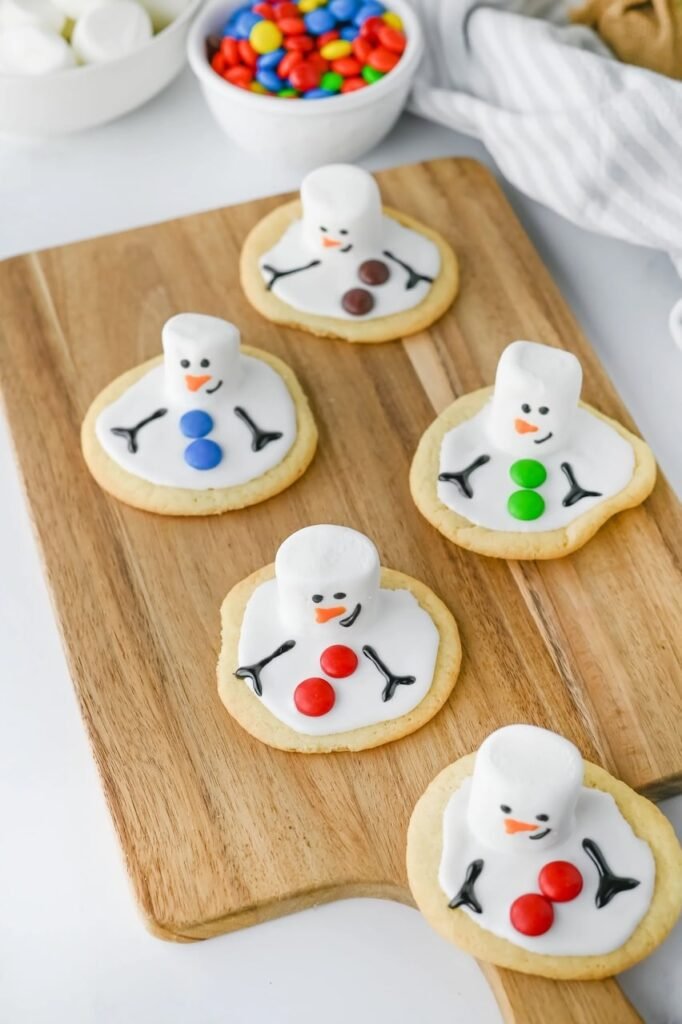
- 32 M&Ms (for colorful buttons — use any mix of red, green, or blue!)
Tip: Let your cookie dough sit out for 10–15 minutes before rolling so it’s easier to handle and doesn’t crack when you cut.
How to Make Melted Snowman Cookies
Prepare the Dough: Preheat the oven and prepare the sugar cookie dough according to the package directions. Arrange the dough portions on a parchment-lined baking sheet, leaving ample space between each cookie to allow for spreading. Bake until the edges are lightly golden. Transfer to a wire rack and allow the cookies to cool completely before decorating.

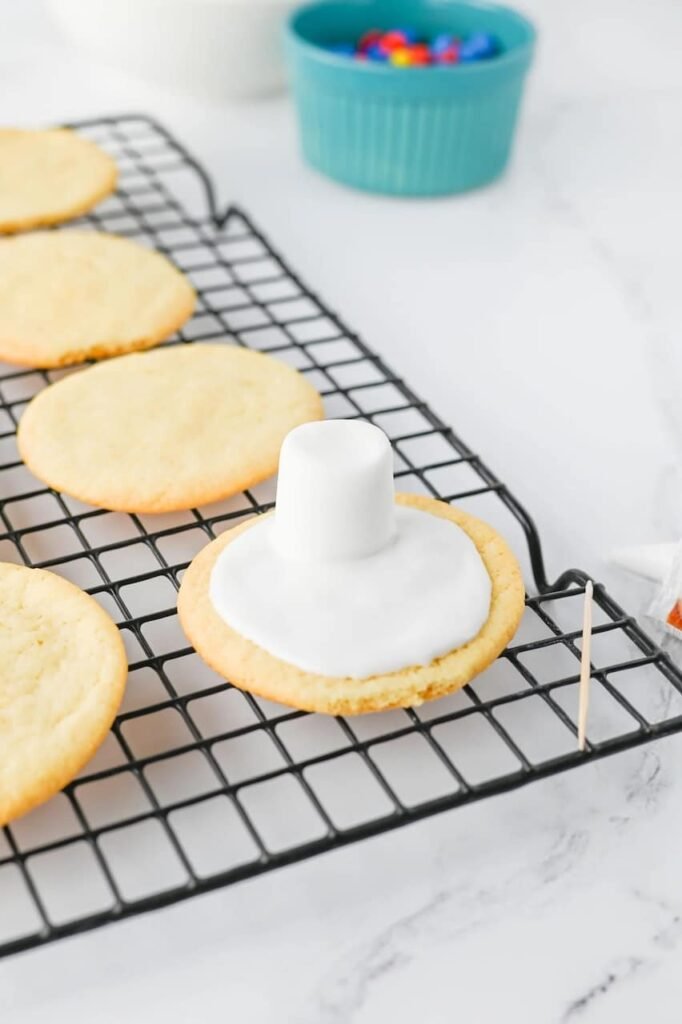
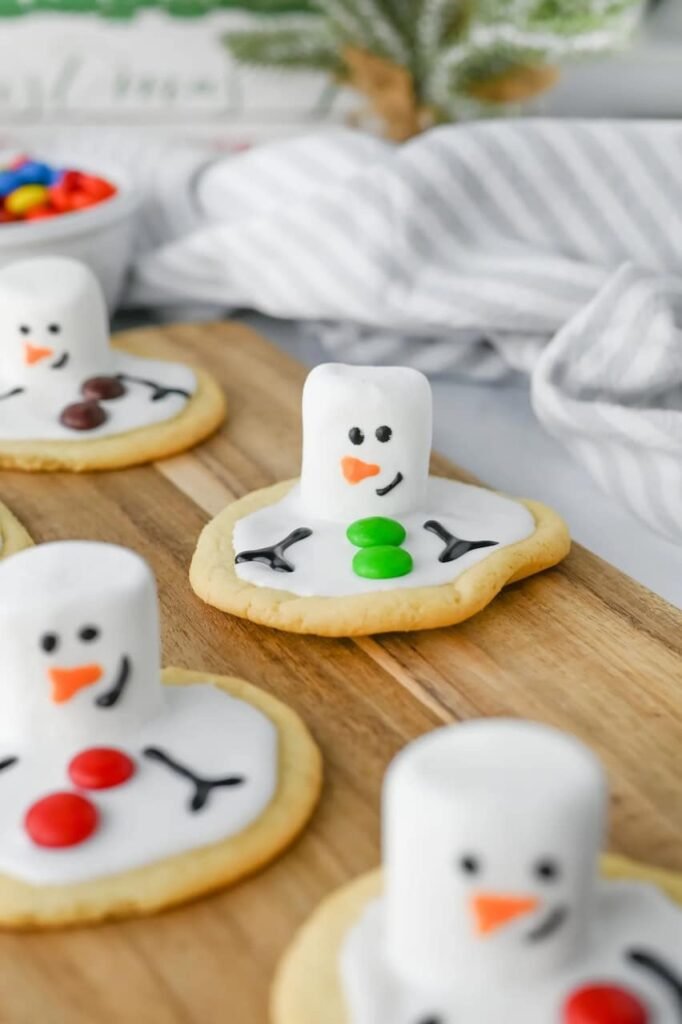
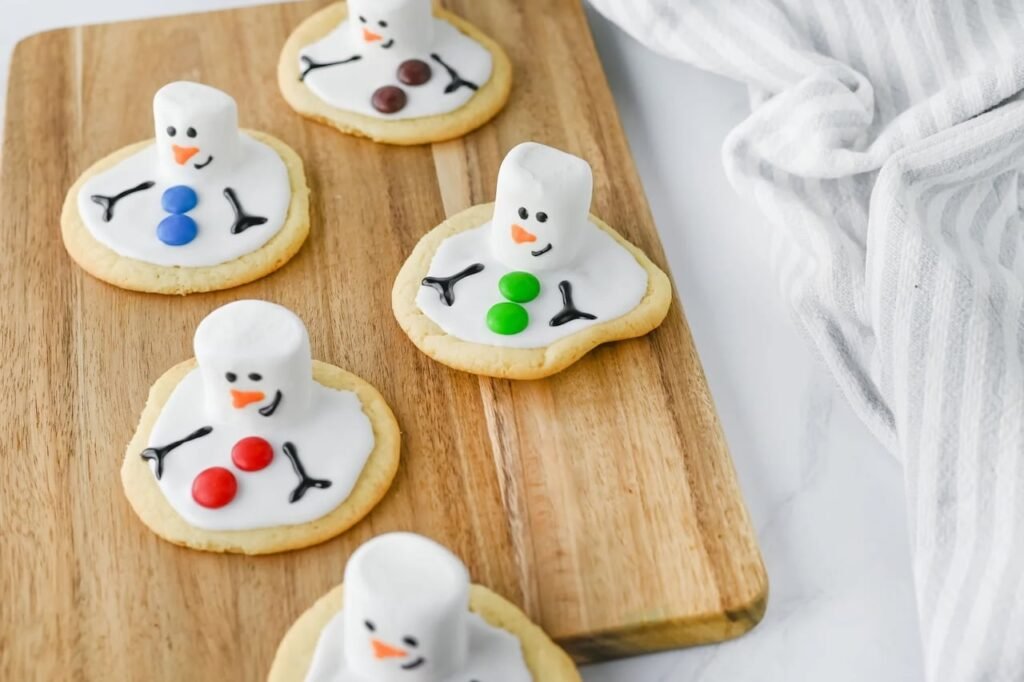
Create the “Melted Snow” Base: Using a spoon or small offset spatula, spread a generous layer of white cookie icing over each cooled cookie. Gently swirl the icing outward with the back of the spoon or a toothpick to create the appearance of melting snow.
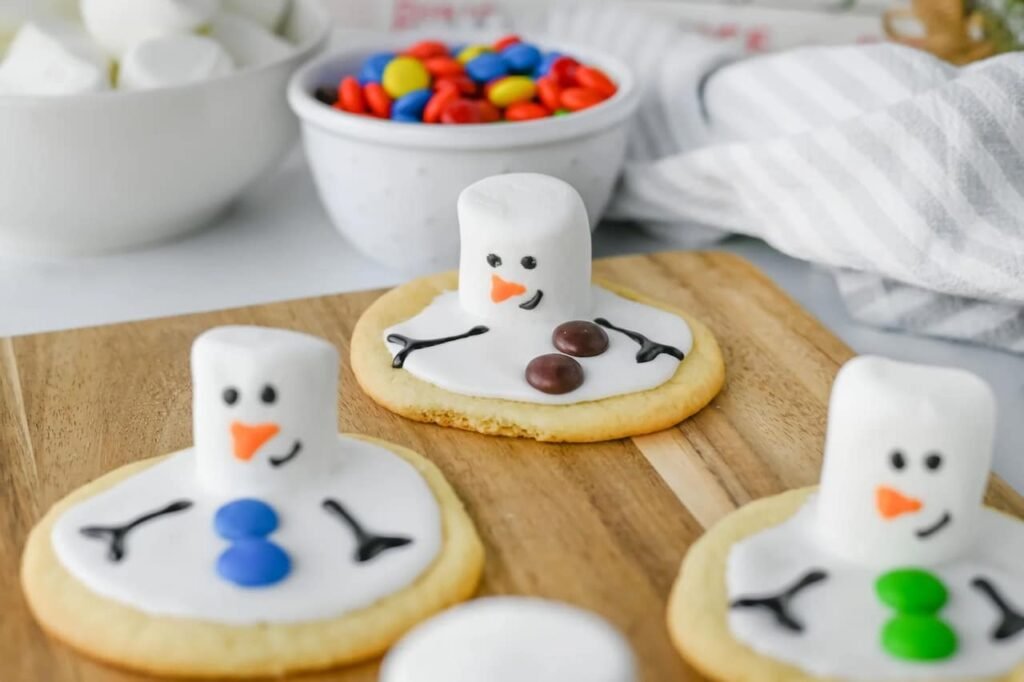
Add the Snowman’s Head: While the icing remains soft, press one large marshmallow onto one side of each cookie to form the snowman’s head. Allow the cookies to rest for several minutes so the icing begins to secure the marshmallow in place.
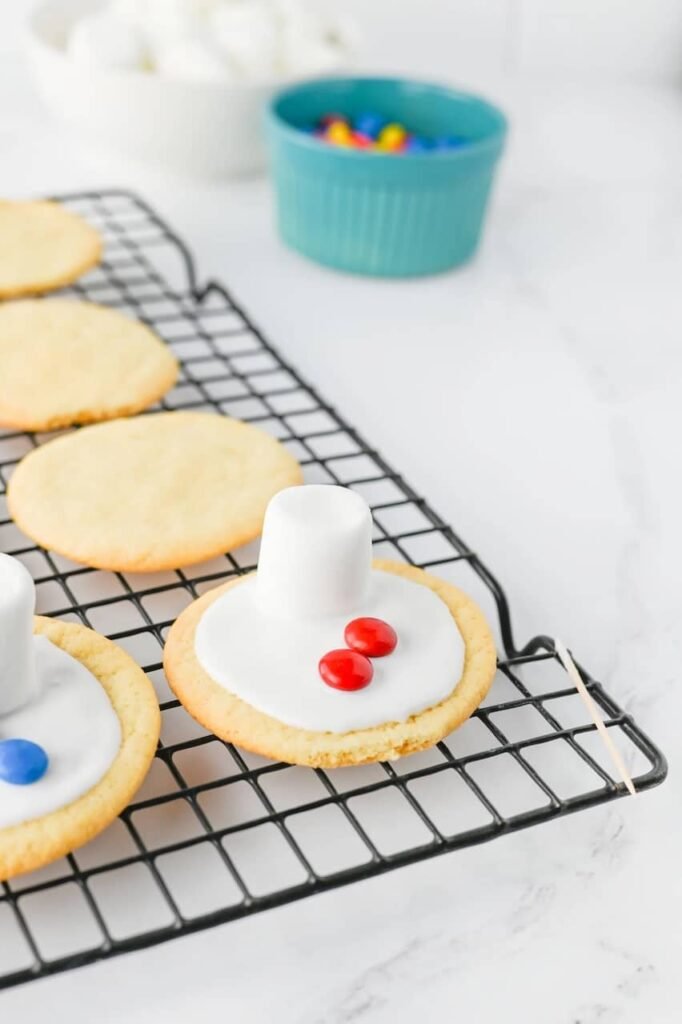
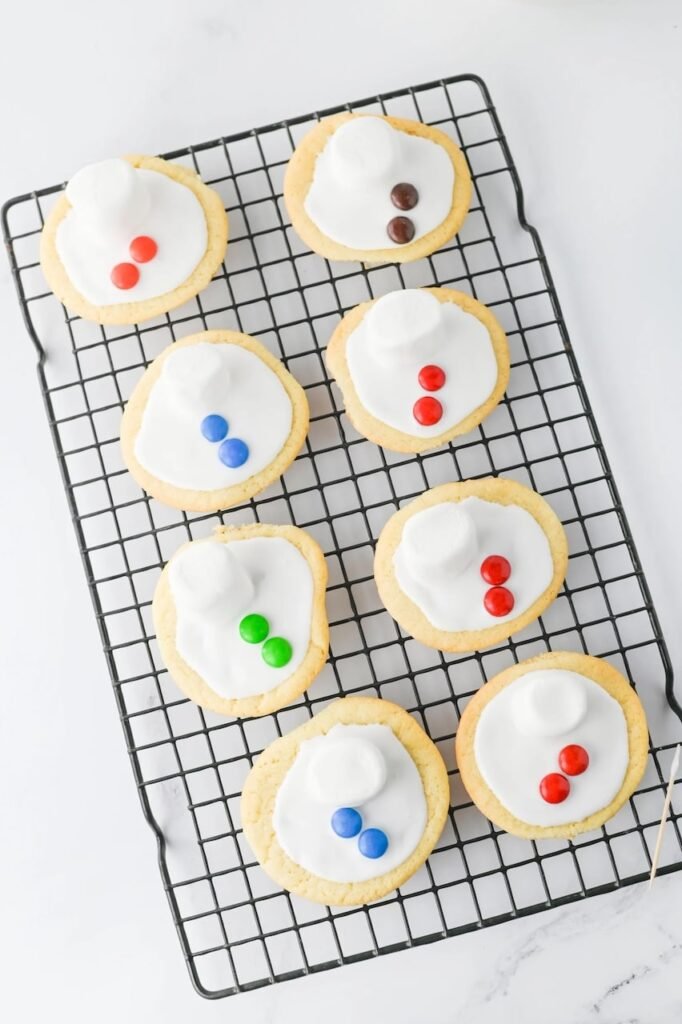
Add Buttons and Details: Press two M&Ms into the icing beneath the marshmallow to form buttons. Using black cookie icing, pipe two small dots for eyes and a curved line for the mouth. Add a small dot of orange icing in the shape of a carrot nose. Finish by piping black icing arms extending from each side of the “snow puddle.”
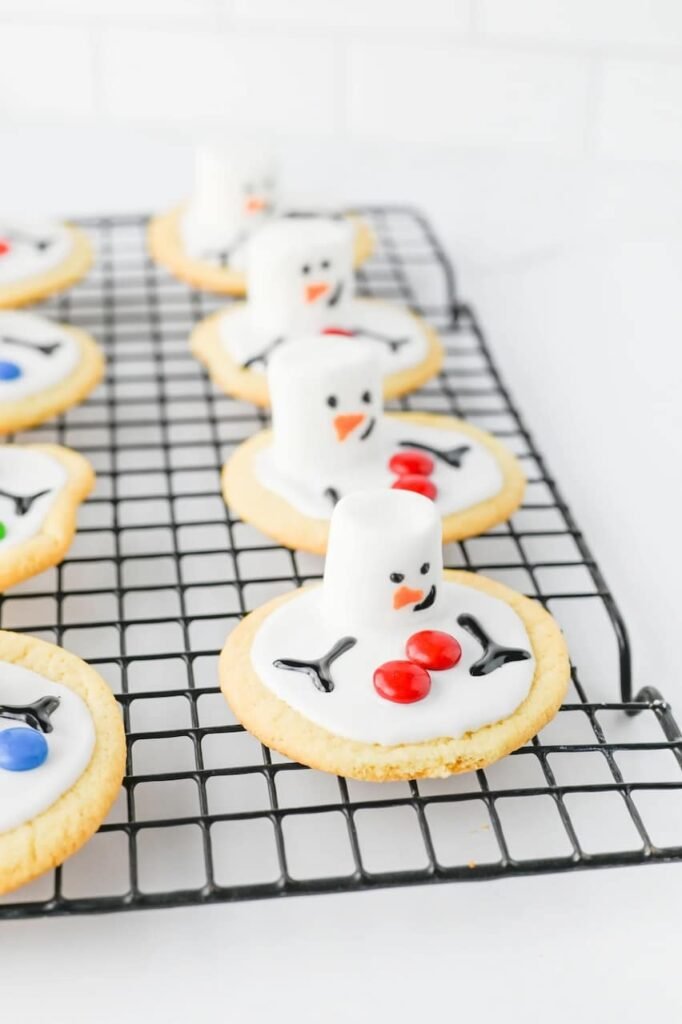
Set and Serve: Allow the decorated cookies to rest at room temperature for 30–60 minutes, or until the icing has firmed and set.
Tip: For gifting or transporting, let the icing fully harden before stacking or wrapping. Store in a single layer or between sheets of wax paper in an airtight container for up to 4 days.
Tips for Perfect Melted Snowman Cookies
Serving Suggestions
- Holiday platters: Add them to your Christmas cookie tray alongside Soft Sugar Cookies, Peppermint Bark Brownies, or Holiday Fudge for a festive spread.
- Cookie swaps or bake sales: Once the icing sets, they’re easy to pack and always get smiles. Try pairing them with Hot Cocoa Cookies or Reindeer Rice Krispie Treats for a kid-favorite combo.
- With hot cocoa: The marshmallow tops make them a perfect pairing for cozy mugs of Homemade Hot Chocolate Mix.
Storage & Make-Ahead Tips
Keep your Christmas snowman cookies fresh, fluffy, and picture-ready with these easy make-ahead tricks:
- Room temperature: Store in a single layer (or between sheets of wax paper) in an airtight container for up to 4 days.
- Freezer: Freeze undecorated cookies for up to 1 month. Thaw completely, then decorate so the icing and marshmallows stay smooth.
- Gift prep: For holiday gifting, bake and freeze the cookies ahead, then decorate the day before delivery.
- Make-ahead: Bake a double batch now and store half plain, the perfect shortcut for last-minute parties.
Tip: Pop a small piece of bread in the container to keep cookies soft, an old-school trick that still works like magic.
FAQ – Melted Snowman Cookies
And there you have it, the cutest little snowman cookie recipe you’ll ever bake!
Whether you’re making them for a classroom party, gifting to friends, or just adding a little cheer to your holiday table, these cookies are guaranteed to bring smiles.
I’d love to know if you try these melted snowman cookies! Leave a comment below and tell me how yours turned out, or save this recipe to your Pinterest holiday board so you can bake them again next year.

Christmas Melted Snowman Cookies
- Total Time: 32 minutes
- Yield: 16 1x
Ingredients
- 1 (16.5 oz) roll sugar cookie dough
- White cookie icing
- Orange cookie icing
- Black cookie icing
- 16 Large marshmallows
- 32 M&Ms
Instructions
- Prepare sugar cookie dough as directed on the package. Place on a baking sheet, leaving space for spreading. Bake until edges are lightly golden. Cool completely before decorating.
- Spread white cookie icing over each cookie, swirling outward with a spoon or toothpick to create a melting effect.
- While icing is wet, press one marshmallow on one side of each cookie for the snowman’s head. Let set a few minutes.
- Press two M&Ms beneath the marshmallow for buttons. Use black icing for eyes, mouth, and arms; orange icing for the carrot nose.
- Let cookies rest 30–60 minutes until icing firms up. Serve, gift, or display on your holiday tray.
- Prep Time: 20 minutes
- Cook Time: 12 minutes
- Category: Dessert, Holiday Treats
- Cuisine: American