Santa Hat Brownies for Christmas
Every December, my kitchen turns into a holiday workshop, half baking zone, half glitter explosion. Between the sugar cookie chaos and endless gift wrapping, I’m always hunting for easy desserts that still feel magical. That’s how these Santa hat brownies became a family tradition.
Yesterday morning, I woke up with the idea for these Santa hat brownies, but there was one problem: I was completely out of flour. Since I wasn’t about to brave the cold for a grocery run, I reached for a box of brownie mix instead. Honestly, I don’t understand the criticism around boxed mixes. They’re convenient, easy to use, and can still make a delicious dessert. These festive brownie bites turned out so cute and are perfect for the holiday season. If you’re baking with little helpers, be sure to get the kids involved.
You might also enjoy these adorable Christmas Pretzel Santa Hats or browse this collection of Christmas Food Ideas (For Kids) for even more holiday fun.
Why You’ll Love These Christmas Brownies
✅ Quick & Easy: Start with your favorite brownie mix — no complicated baking steps needed.
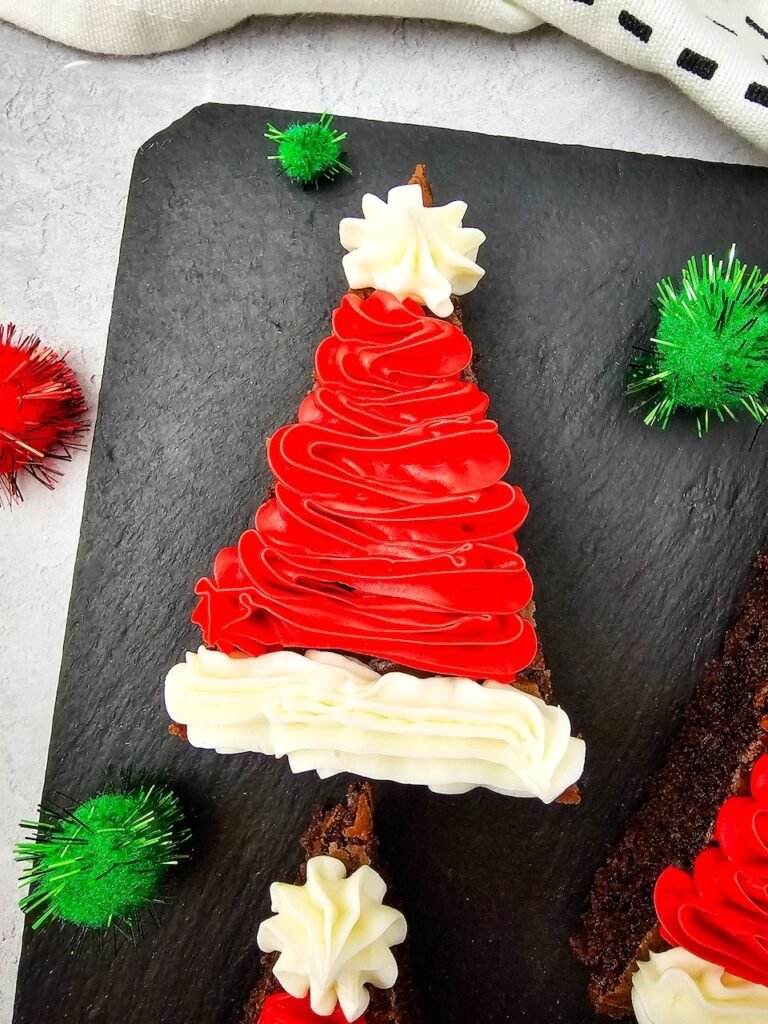
🎅 Festive & Adorable: The red and white frosting turns simple brownies into mini Santa hats in minutes.
👩👧 Kid-Friendly Fun: Little helpers will love decorating (and sneaking a few strawberries).
🍫 Minimal Ingredients: Just brownies, frosting, and a few tools — that’s it!
🎄 Perfect for Parties: Great for cookie swaps, classroom treats, or family gatherings.
✨ Customizable: Try fun twists with frosting colors, sprinkles, or even different shapes for other holidays.
Ingredients You’ll Need
(Keep scrolling to the recipe card below for the full printable recipe!)
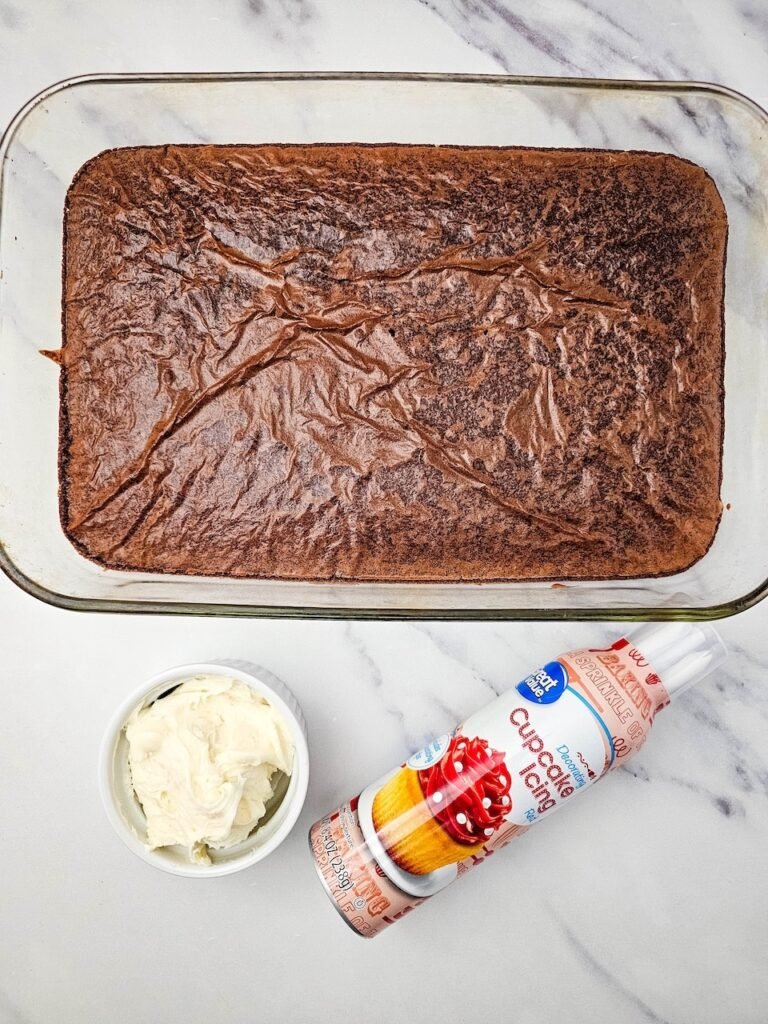
- Prepared brownies – Homemade or boxed brownies both work well, but a fudgy brownie tends to hold up best when decorating.
- Red cupcake icing or frosting – This creates the Santa hat design. We used a tube of red cupcake icing because it was easier to find than red frosting, and it made decorating simple and mess-free.
- Vanilla frosting – Used for the white trim and pom-pom on each Santa hat. A thicker frosting works best for creating clean, defined decorations.
Step-by-Step Instructions

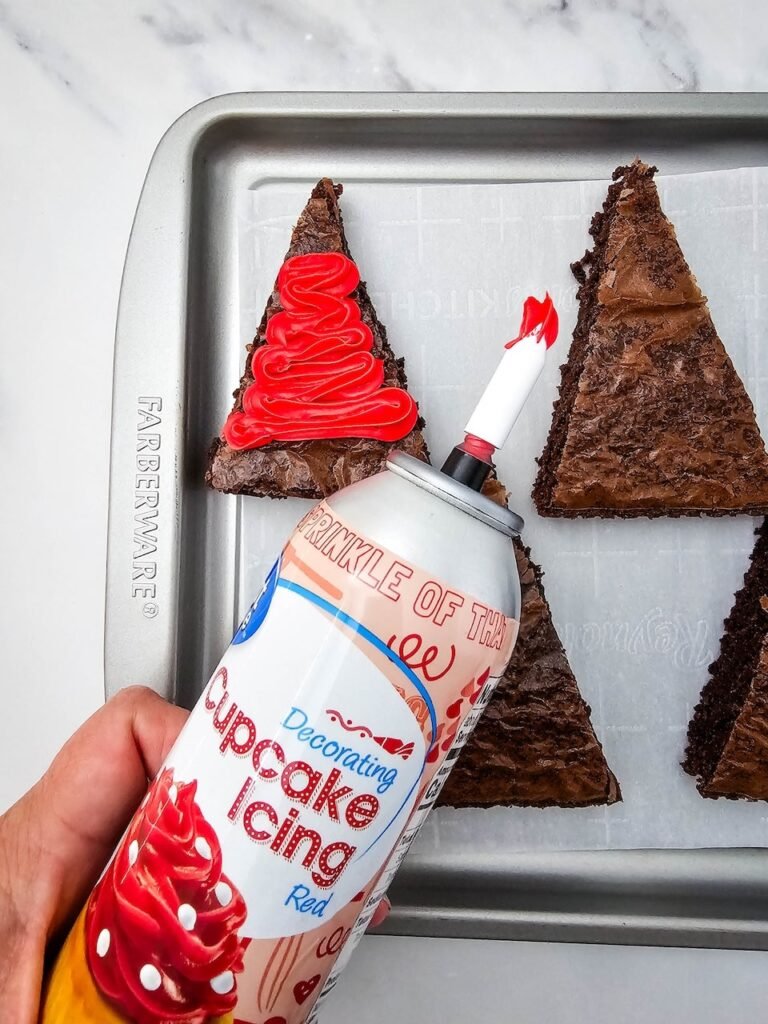
1. Cut the brownies into triangles. Cut the cooled 9×13-inch pan of brownies in half lengthwise. Then cut each long row into 7 triangles.
2. Arrange the brownie hats. Place the brownie triangles on a baking sheet, platter, or serving tray, leaving a little space between each one so they’re easy to decorate.
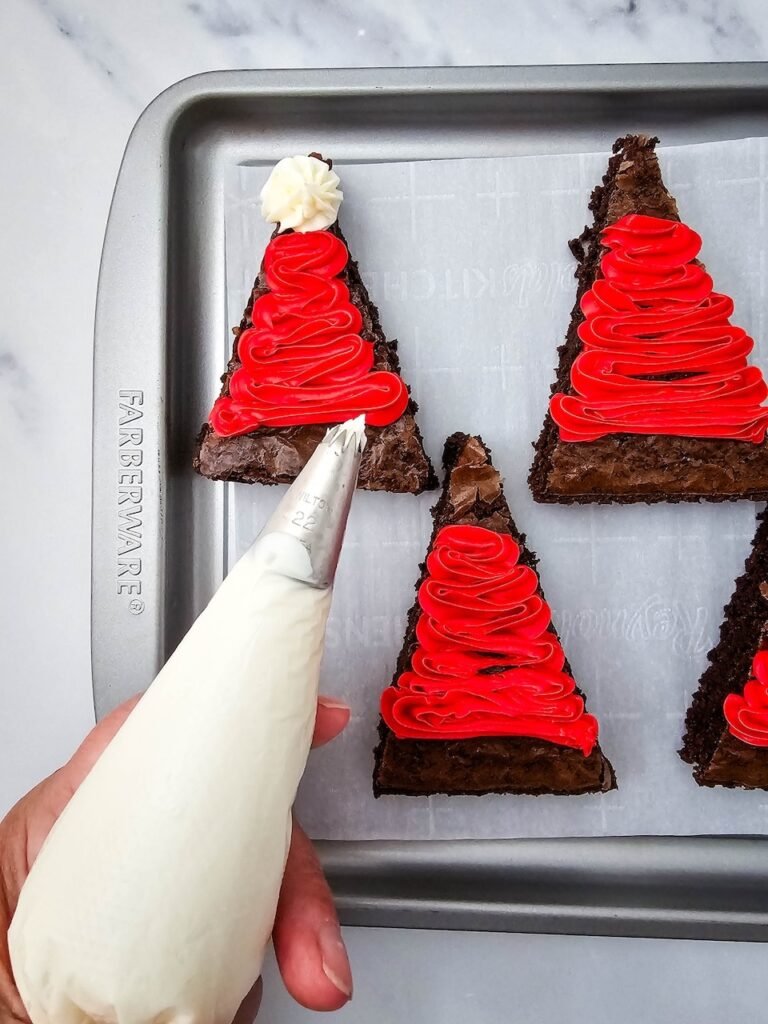
3. Pipe the red Santa hats. Using the star tip that came with the red icing, pipe red frosting onto each brownie in a back-and-forth motion. Start about ½ inch below the tip of the triangle and stop about ½ inch above the bottom edge so there’s room for the white trim.
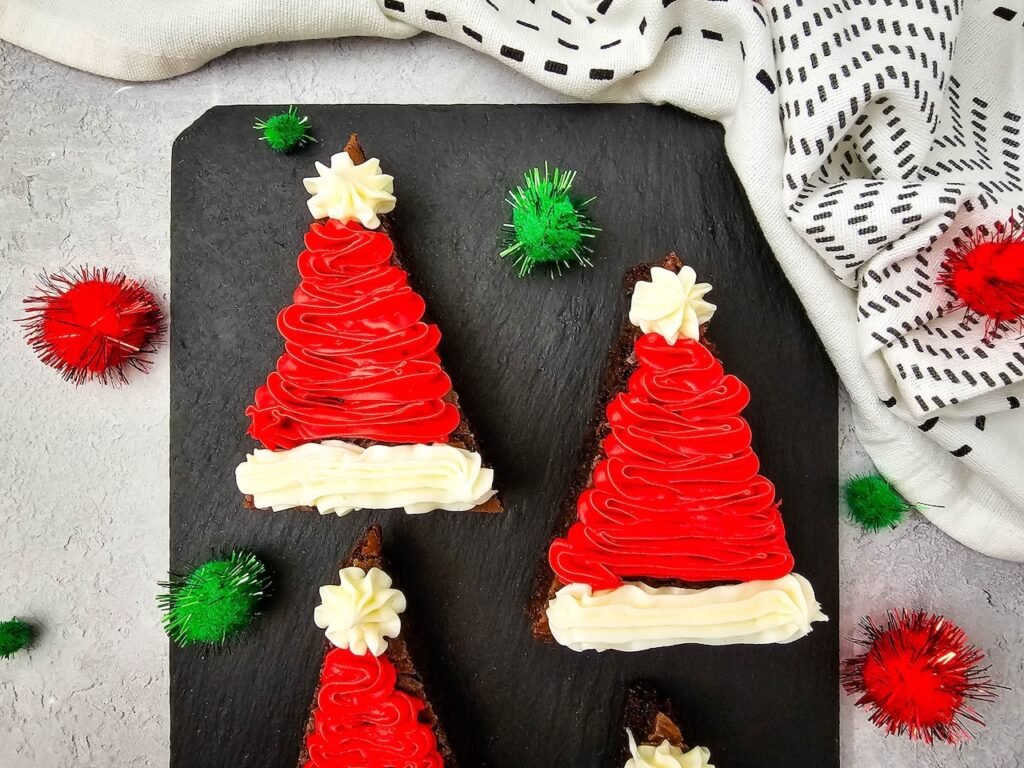
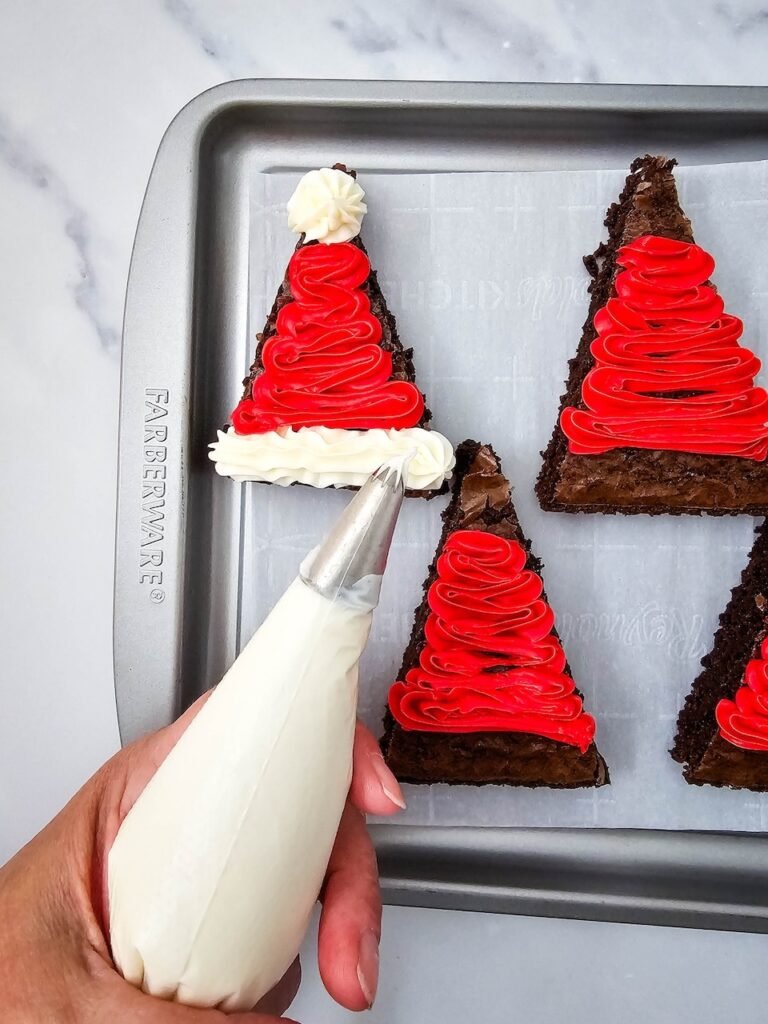
4. Add the white frosting details. Add the vanilla frosting to a piping bag fitted with a Wilton #22 tip. Pipe a small dot at the tip of each Santa hat, then pipe a line across the bottom to create the fluffy white trim.
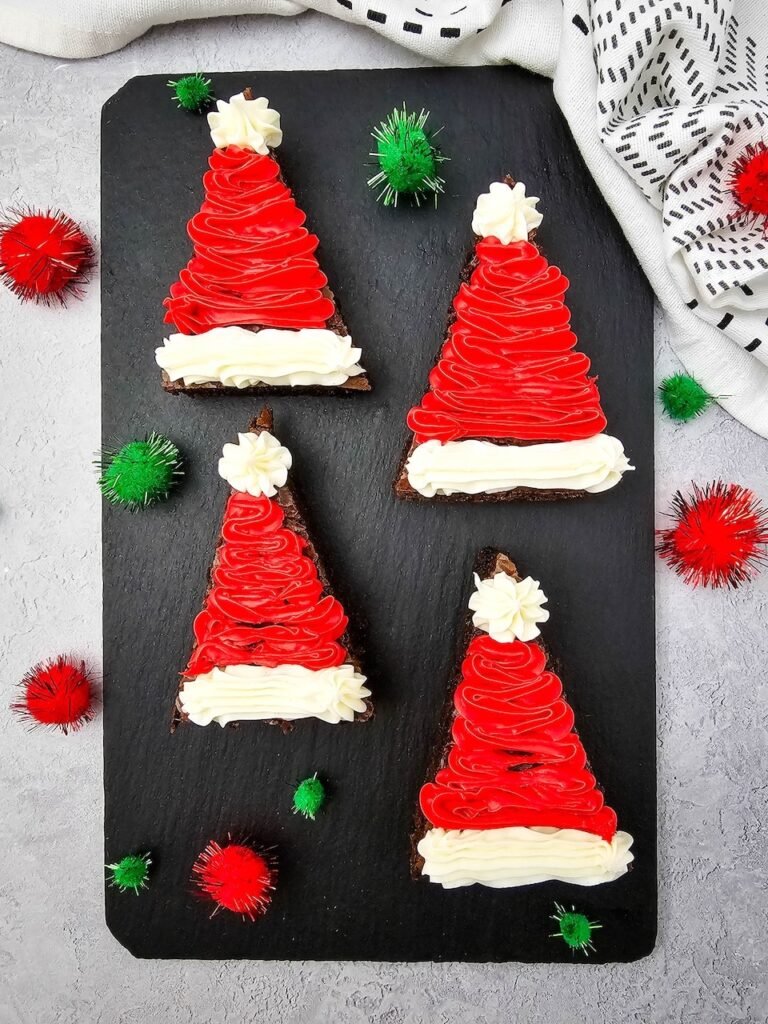
5. Serve and enjoy. Let the frosting set slightly, then serve these festive Santa Hat Brownies.
Tips for Perfect Santa Hat Brownies
Make Ahead Instructions
- Bake the brownies up to 2 days in advance. Once completely cooled, cover the brownies tightly and store them at room temperature until you’re ready to decorate.
- Wait to decorate until the day of serving. While the brownies can be decorated ahead of time, the frosting details look freshest when added within a few hours of serving.
- Store decorated brownies in an airtight container. Place them in a single layer whenever possible to keep the Santa hat decorations intact.
- Keep leftovers at room temperature for up to 3 days. Store the brownies covered in a cool, dry place to maintain their soft, fudgy texture.
- Avoid freezing after decorating. The brownies freeze well on their own, but the frosting decorations can lose their texture and appearance after thawing. For best results, freeze the undecorated brownies and add the frosting after defrosting.
Your Santa Hat Brownies Questions, Answered!

Christmas Santa Hat Brownies
These Christmas Santa hat brownies are the easiest festive dessert you’ll make this holiday! Start with a pan of brownies, then add red and white frosting for the cutest edible Santa hats. Perfect for parties, cookie swaps, or family baking fun.
- Total Time15 minutes
- Yield14 1x
Ingredients
- 1 (9×13-inch) pan of prepared and cooled brownies (use a mix or your favorite recipe)
- 1/2–2/3 cup red cupcake icing or frosting (we used the tube of icing since red frosting wasn’t available)
- 1/3 cup vanilla frosting
Equipment:
- Piping bag
- Wilton #22 tip
- Sharp knife
Instructions
- Cut the pan of brownies in half lengthwise, then cut each small row into 7 triangles. The ends will not be used.
- Arrange the triangle brownies on a baking sheet or tray.
- Pipe the red frosting onto each brownie, starting from ½ inch under the tip of the triangle until ½ inch before the bottom, moving in a back-and-forth motion. Use the star tip that came with the icing (or the same Wilton #22 tip if using frosting).
- Add the vanilla frosting to a piping bag with the Wilton #22 tip and pipe a dot on the tip of the Santa hat, then a line at the bottom.
Notes
- Make sure the brownies are completely cooled before frosting.
- Store in an airtight container in the refrigerator for up to 3 days.
- For the best presentation, chill for 15 minutes before serving.
Nutrition
- Serving Size: 1 brownie
- Calories: 220 kcal
- Sugar: 22 g
- Sodium: 120 mg
- Fat: 10 g
- Saturated Fat: 4 g
- Carbohydrates: 30 g
- Fiber: 1 g
- Protein: 2 g
- Cholesterol: 25 mg