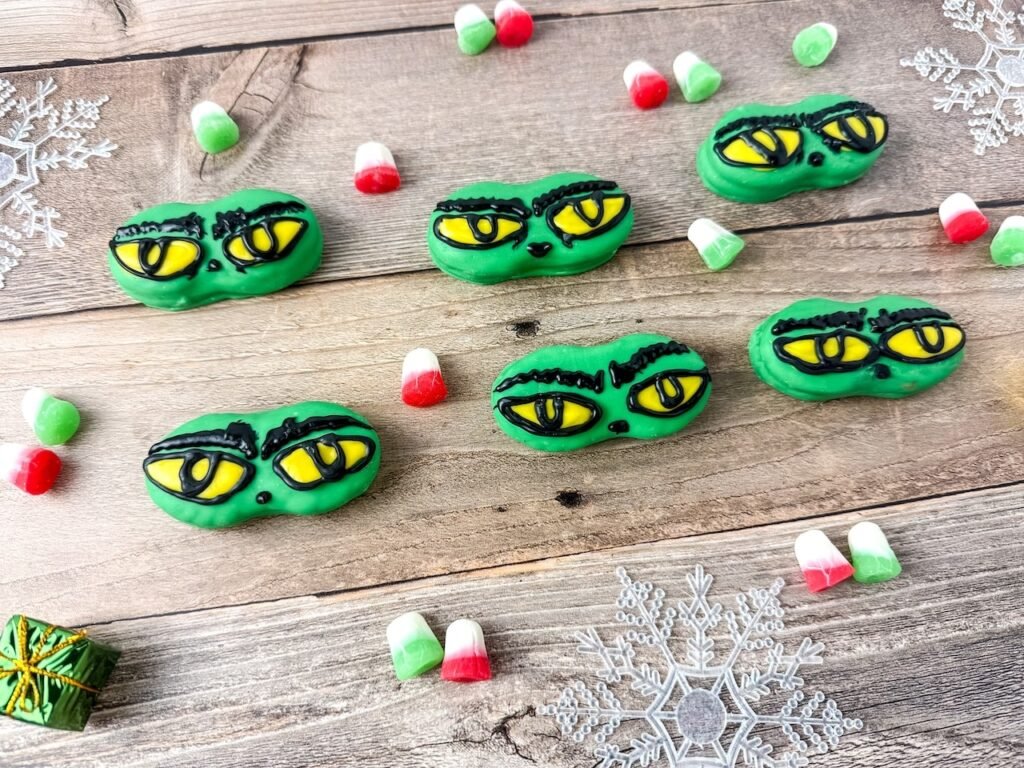
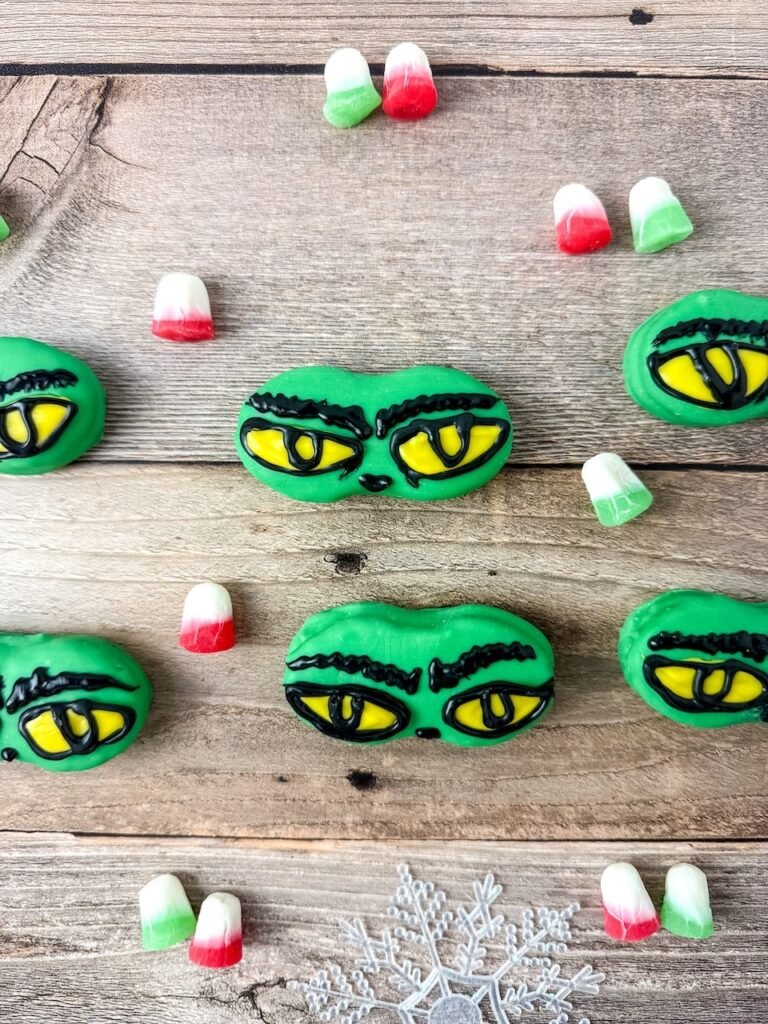
Christmas Grinch Eye Nutter Butter Cookies
If your family loves How the Grinch Stole Christmas, these no-bake Grinch eye Nutter Butter cookies will steal the show this holiday season! They’re a quick holiday movie-night cookie project the kids will love — melt, dip, and decorate in under 60 minutes.
Ready in about an hour from start to finish, these Grinch-inspired cookies are the perfect mix of sweet, silly, and simple. Whether you’re hosting a holiday movie night or filling your cookie trays for gifting, they’ll bring instant smiles (and maybe a few green fingers!).
No oven required, just melt, dip, and decorate — a perfect family baking project for busy December days.
When my oldest grandson first helped me make these, he kept licking the green chocolate and saying, “I think the Grinch is delicious!” Now it’s our official start to Christmas season — Grinch cookies and cocoa, every December.
Why You’ll Love These Grinch Eye Nutter Butter Cookies
- No baking needed: Just melt, dip, and decorate — a great activity for kids or last-minute holiday prep.
- Movie-night favorite: Pair them with cocoa while watching How the Grinch Stole Christmas for the full Whoville experience.
- Perfect for gifting: These cookies stay fresh for days and look adorable wrapped in cellophane with red ribbon.
Grinch Eye Nutter Butter Cookies at a Glance
Prep time: 40 minutes
Total time: 55 minutes
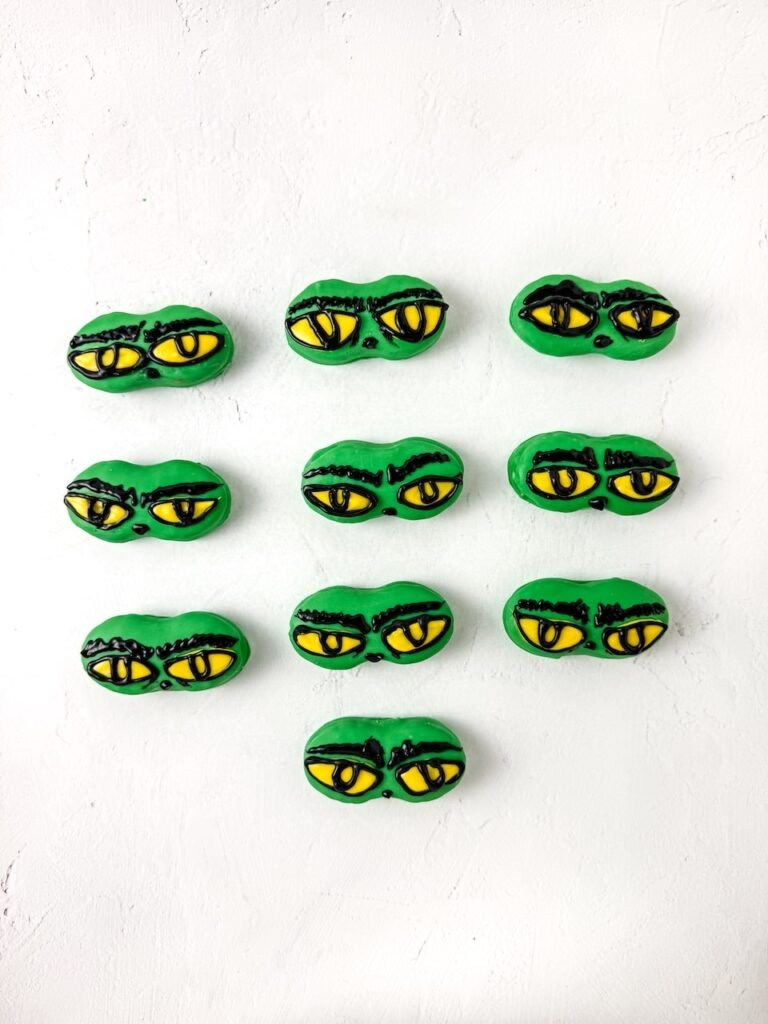
Yield: 10 cookies
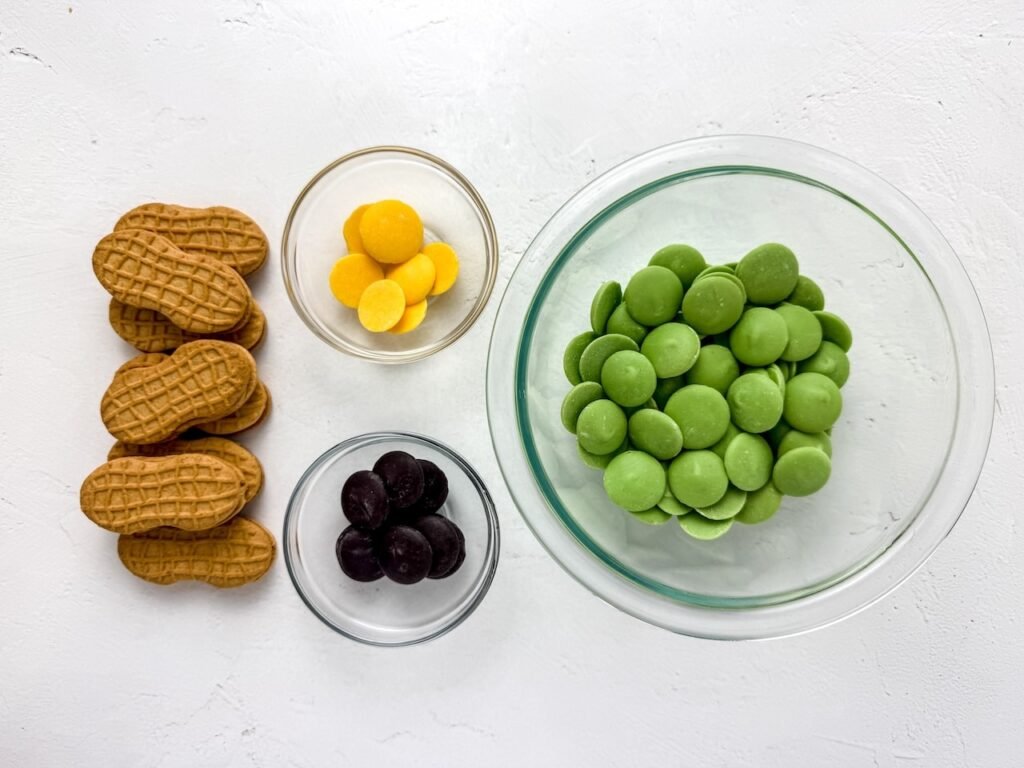
Ingredients You’ll Need for Grinch Nutter Butter Cookies
You only need a handful of simple ingredients — most are pantry staples.
- 10 Nutter Butters
- 6 ounces green chocolate melts
- 2 ounces yellow chocolate melts
- 2 ounces black chocolate melts
Substitutions & Dietary Notes
- Nut-Free: Swap Nutter Butters for vanilla sandwich cookies (like Vienna Fingers) or homemade oval sugar cookies.
- Gluten-Free: Use gluten-free sandwich cookies and check candy melts for GF labeling (Wilton usually is).
- Dairy-Free/Vegan: Choose vegan candy melts (Enjoy Life, Sweet Lauren’s) and plant-based food coloring.
- White Chocolate Grinch: Tint melted white chocolate with green oil-based coloring (not water-based).
- Minty Twist: Stir in a drop of peppermint extract for cool holiday flavor.
- Red Heart Detail: Add a red heart sprinkle to each cookie — just like the Grinch’s growing heart.
Kitchen Tools
- Piping Bags
- Microwave Safe Bowls
- Parchment Paper
- Fork/ Mini Spatula
- Toothpicks
How to Make Grinch Nutter Butter Cookies
These no-bake Grinch cookies are so simple that even the littlest helpers can join in. Just melt, dip, decorate — and watch the Grinch grin appear!
Step 1. Melt the green candy melts: Place the green melts in a microwave-safe bowl. Heat in 30-second intervals, stirring each time, until smooth.
Step 2. Dip the cookies: Dip one Nutter Butter at a time into the melted green chocolate. Make sure it’s fully covered. Lift it out with a fork or spatula and set it on parchment paper.
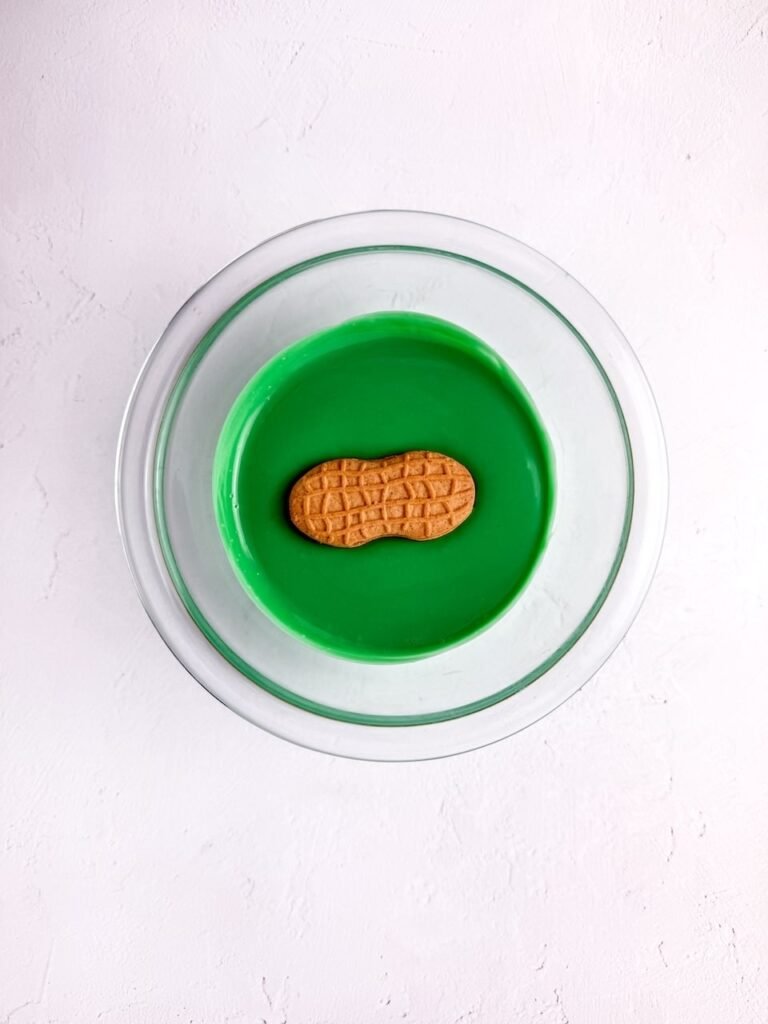
Step 3. Chill to harden: Repeat for all cookies, then place them in the freezer for about 8 minutes until the coating sets.
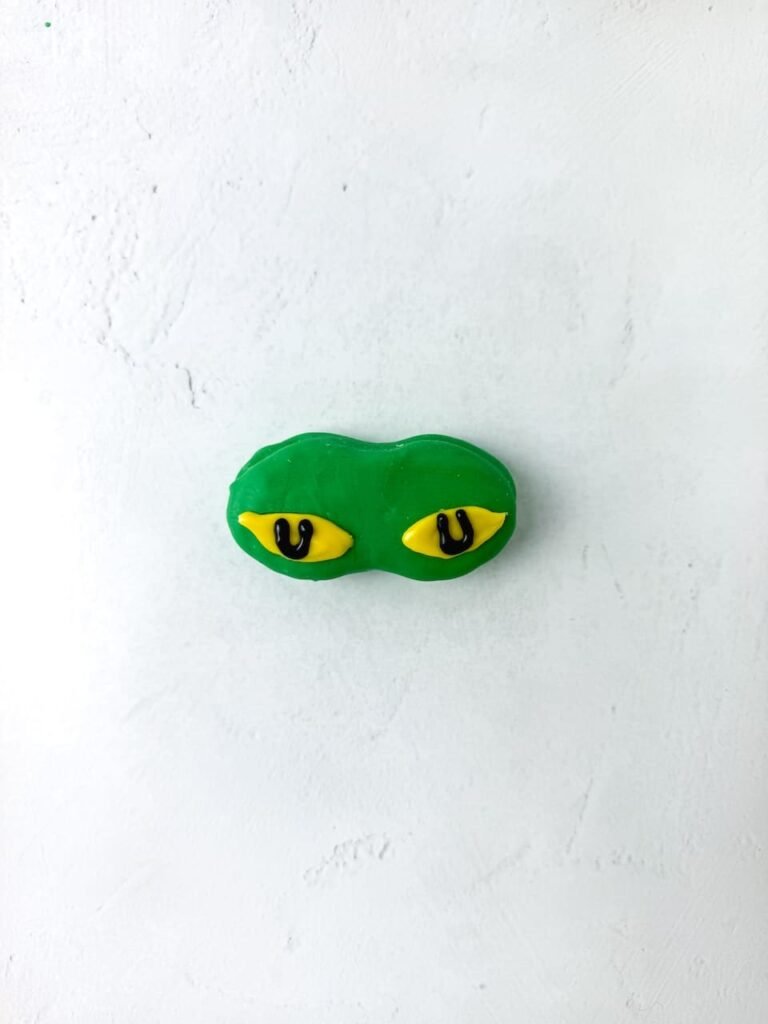
Step 4. Melt yellow and black candy melts: Heat each color in a separate bowl using the same 30-second method. Pour each into its own piping bag and snip a tiny hole at the tip.
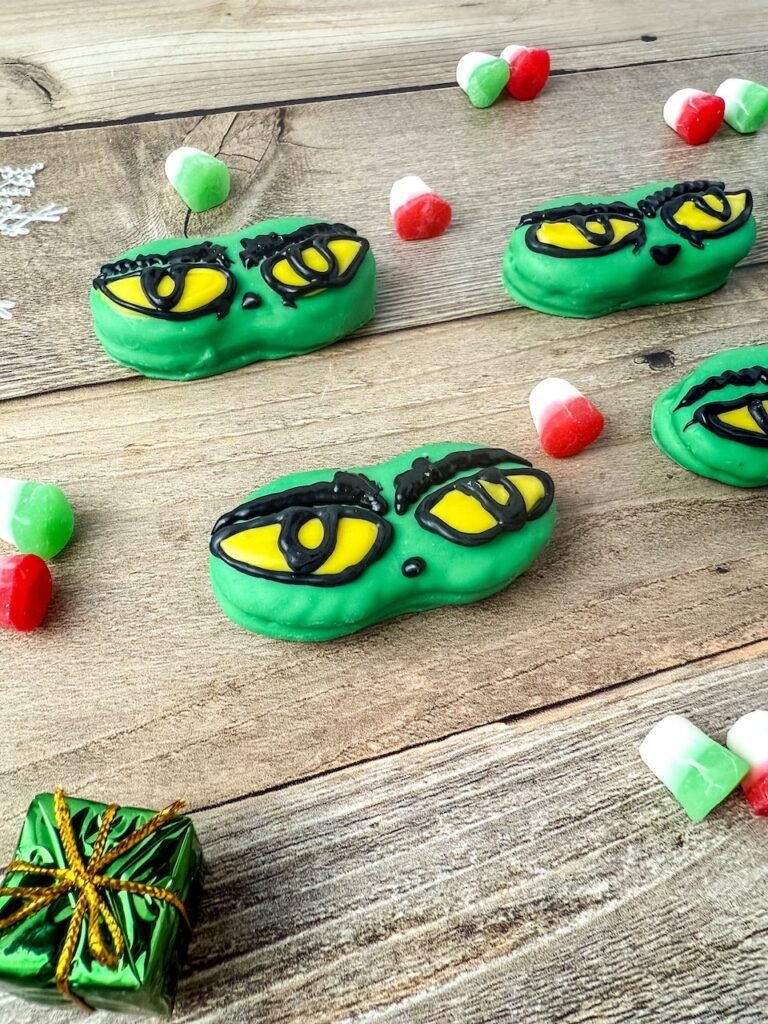
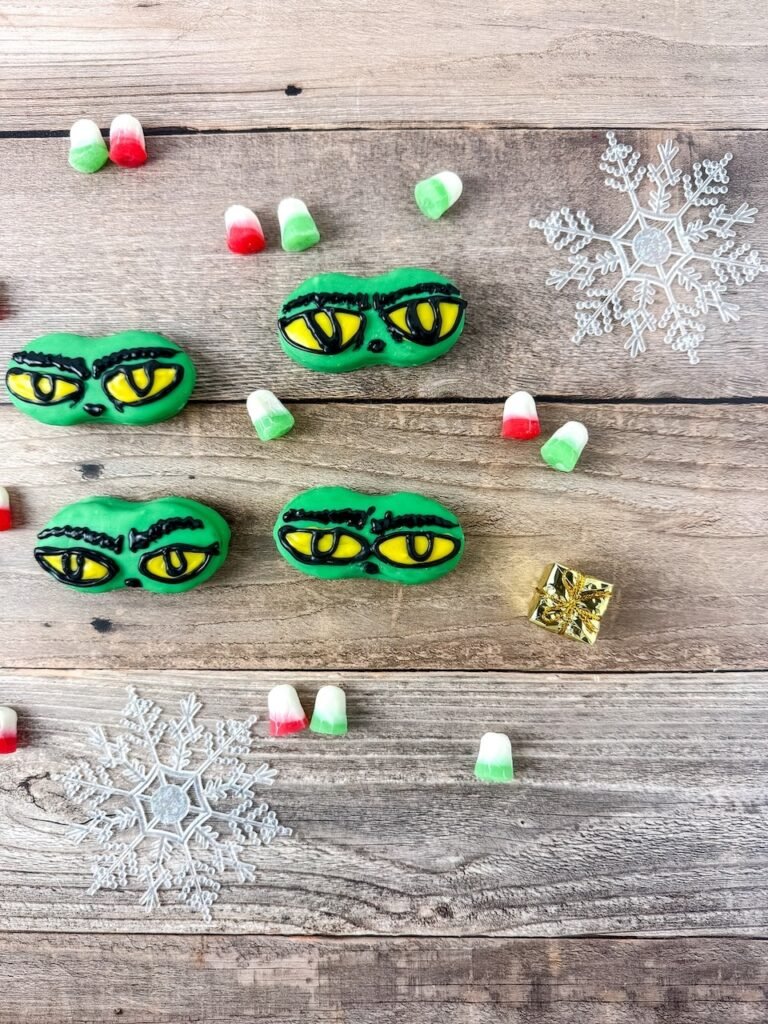
Step 5. Add the Grinch’s eyes: Pipe two yellow ovals for eyes on each cookie. Let them dry for a few minutes, then outline each oval with black chocolate.
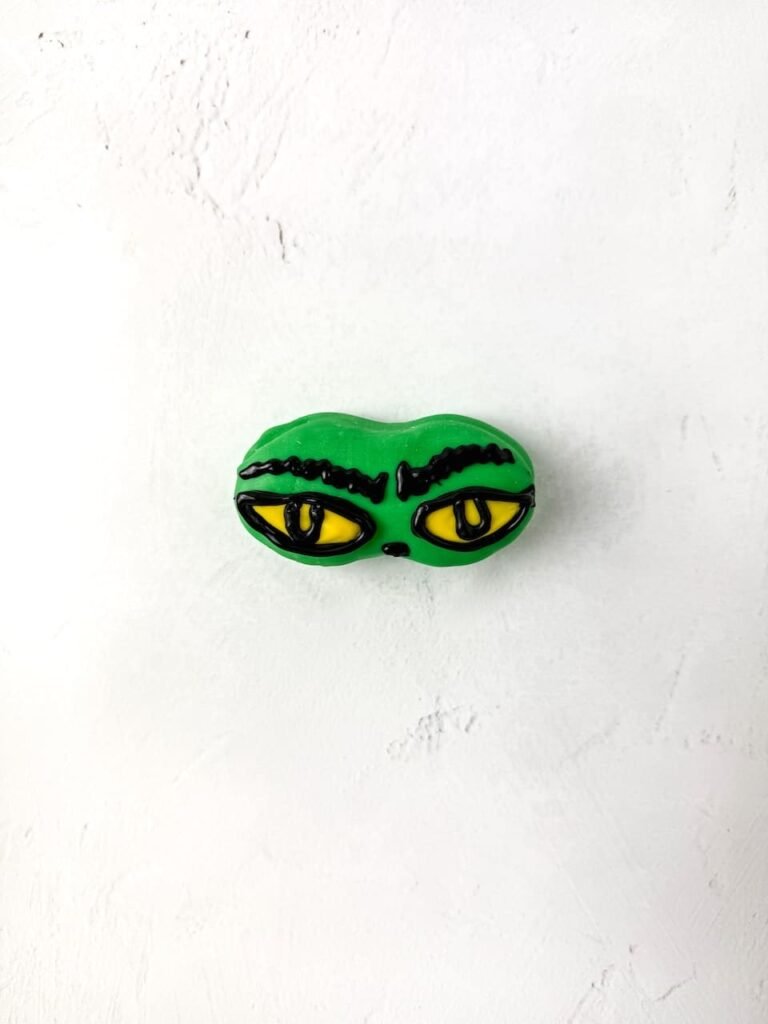
Step 6. Draw the eyebrows and nose: Use the black chocolate to add wiggly eyebrows above the eyes and a small dot below for the nose.
Don’t worry if your first dip looks uneven — that’s just the Grinch’s personality showing up early. If the candy coating feels too thick, a teaspoon of coconut oil will smooth things out faster than you can say “Whoville.”
Step 7. Let them set and serve: Allow the cookies to dry for a few minutes, then serve or package them for gifting.
Tips for Perfect Grinch Candy Melt Cookies
Fun Variations
The best part about these Grinch-themed cookies is how easy they are to customize.
- Minty Grinch: Stir a drop of peppermint extract into the melted candy for a cool holiday flavor.
- White Chocolate Grinch: Swap green melts for white candy melts tinted with gel food color.
- Mini Grinches: Use mini Nutter Butters for bite-sized treats.
- Grinch-in-Pink: Replace the red heart candy with a pink one for Valentine’s Day
Grinch Nutter Butter Cookies FAQs
Make Ahead, Storage & Gifting
- Make Ahead: Prepare and decorate up to 3 days in advance. Let the coating harden completely before stacking or wrapping.
- Room Temperature: Store in an airtight container at cool room temp for up to 1 week. Separate layers with wax or parchment paper so the faces don’t smudge.
- Refrigerate: For longer storage (up to 2 weeks), refrigerate in a sealed container. Let cookies sit out 10–15 minutes before serving so the chocolate softens slightly.
- Freeze: Lay cookies in a single layer on a parchment-lined sheet and freeze until firm. Then transfer to a freezer bag or container, separating layers with parchment. Freeze for up to 3 months.
- To thaw: Remove from freezer and let sit at room temperature (still sealed) for 30 minutes to prevent condensation from spotting the coating.
- Gifting: Package in cellophane treat bags tied with red or lime-green ribbon, or layer in a festive tin with parchment between cookies. Add a printable “From Nana’s Kitchen” tag for a sweet personal touch.
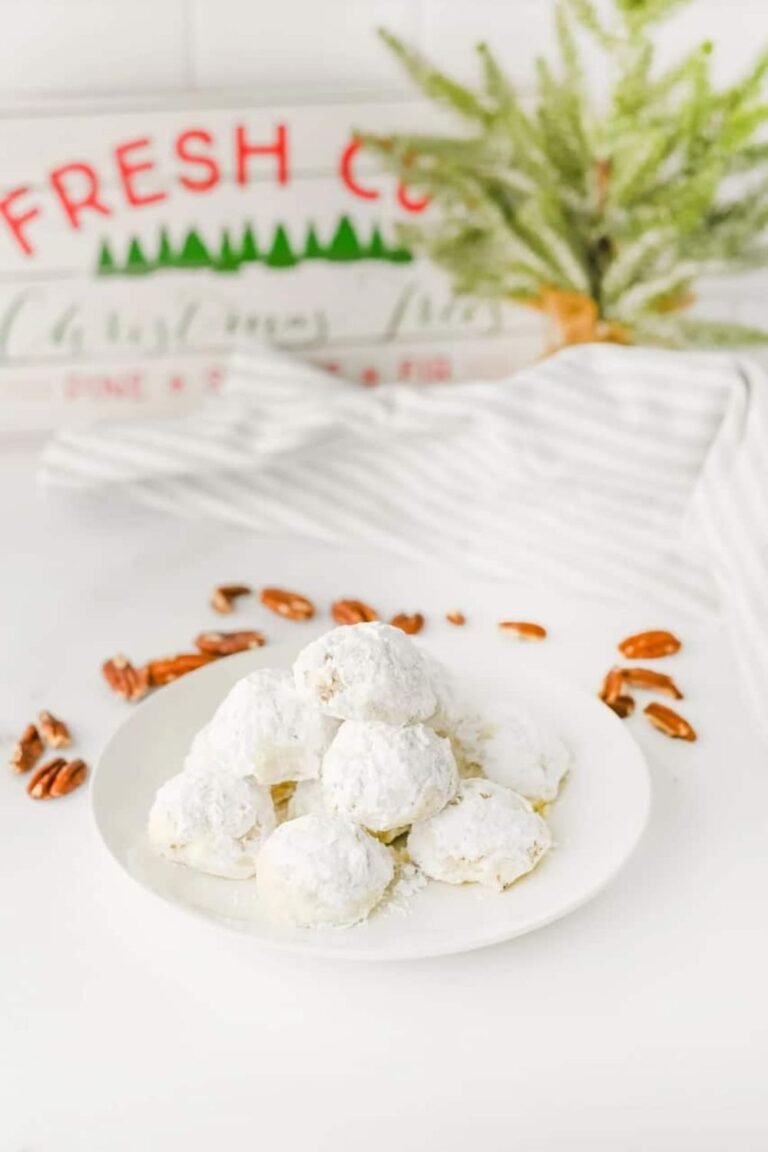
Other Grinch-Themed Desserts You’ll Love
- Grinch Nutter Butter Cookies: Adorable Christmas No-Bake Treats
- Grinch Cookies You’ll Love to Bake This Christmas
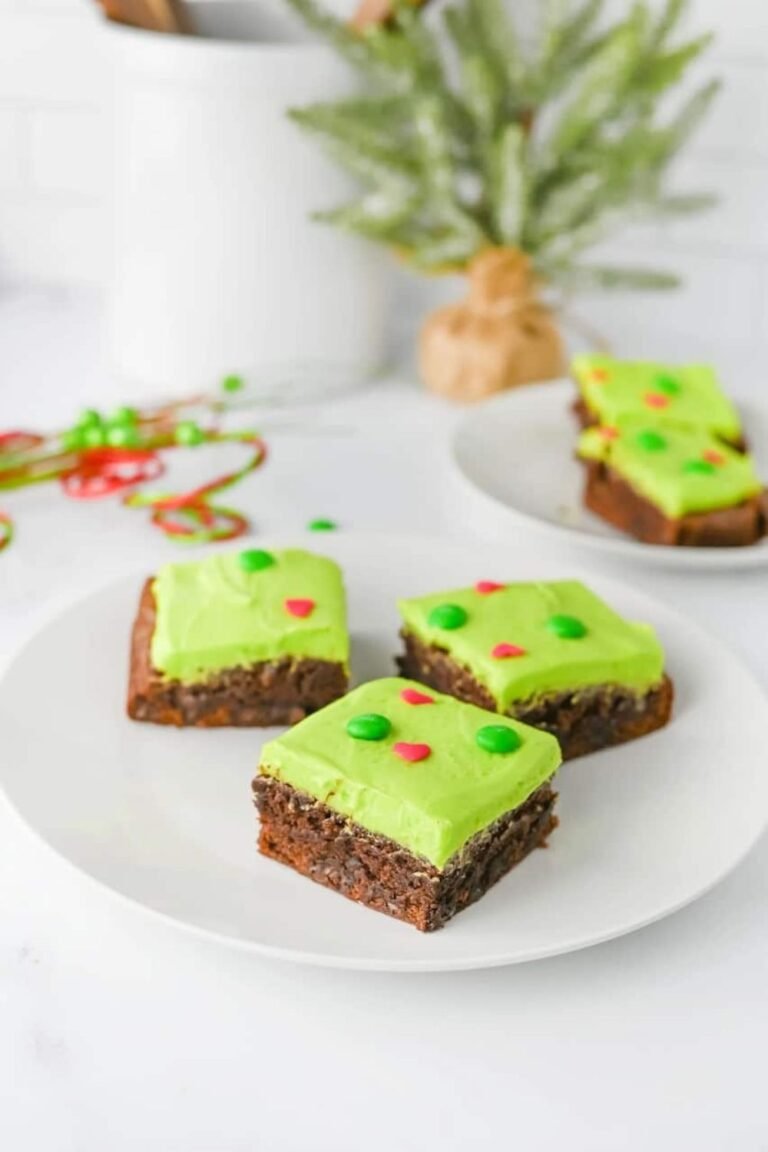
- Easy Grinch Brownies for the Holidays (Fun Christmas Dessert!)
- How to Make a Grinch Poke Cake That Wows Every Christmas Guest
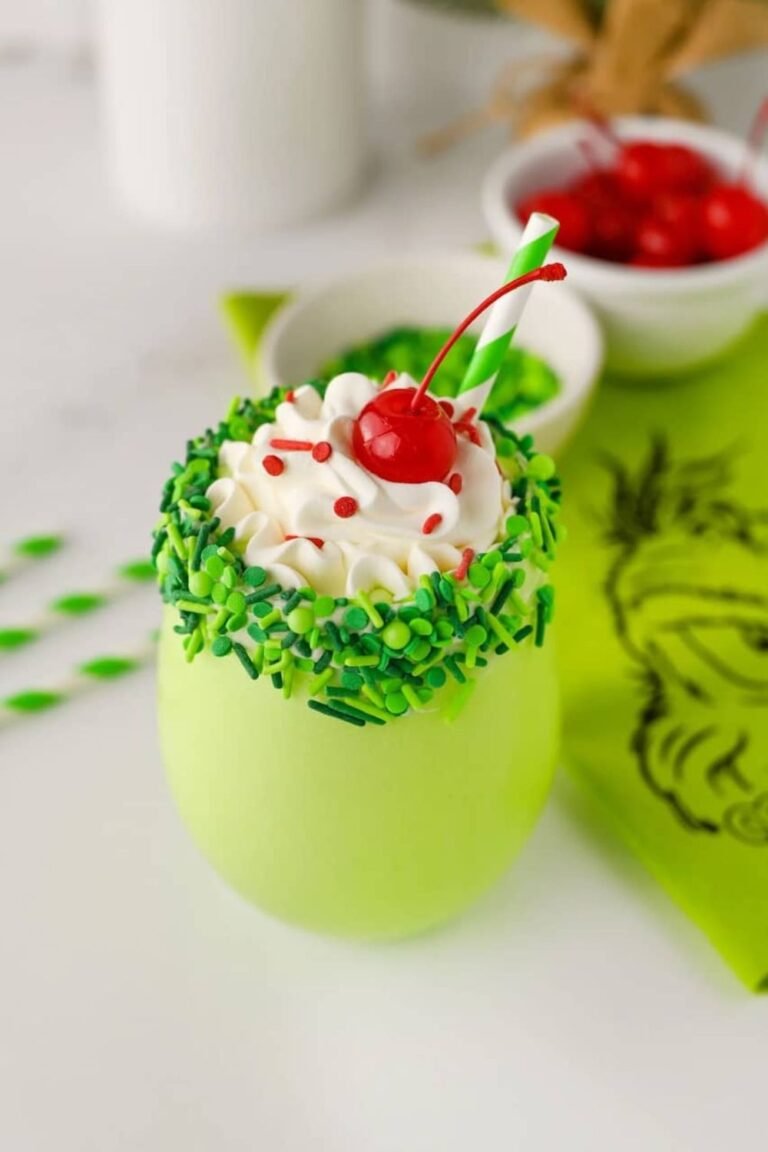
- Whip Up This Delicious Grinch Milkshake in Just 5 Minutes!
- Easy Grinch Oreos Recipe – No-Bake Treat Ready in 30 Minutes

Easy Grinch Nutter Butter Cookies (No-Bake Treat)
- Total Time: 40 minutes
- Yield: 10 1x
Description
These fun and festive Grinch Nutter Butter Cookies are an easy no-bake holiday treat! Dip peanut butter cookies in green chocolate, decorate with candy, and create adorable Grinch faces that kids and adults will love. Perfect for Christmas parties and movie nights!
Ingredients
- 10 Nutter Butter cookies
- 6 ounces green chocolate melts
- 2 ounces yellow chocolate melts
- 2 ounces black chocolate melts
- 1 teaspoon coconut oil (optional, for thinning chocolate)
- Red heart sprinkles (optional)
- Parchment paper
Instructions
- Melt the Green Chocolate: Begin by putting the green chocolate melts in a microwave-safe bowl. Melt the chocolate 30 seconds at a time, stirring between each interval until it’s completely liquified.
- Dip the Nutter Butters: Dip one Nutter Butter at a time into the melted green chocolate, making sure it’s completely covered. Use a fork or mini spatula to remove it from the chocolate and place it on a sheet of parchment paper.
- Repeat and Chill: Repeat the process for each Nutter Butter cookie. Once all are coated, place them in the freezer for about 8 minutes to harden.
- Outline the Eyes: Lay the hardened cookies horizontally. Using a toothpick, trace a small oval shape on both ends of each Nutter Butter—these will become the Grinch’s eyes.
- Prepare the Yellow and Black Chocolate: Melt the yellow and black candy melts in separate bowls, following the same 30-second microwave method. Transfer each melted color into its own piping bag, then cut a tiny hole at the tip.
- Fill the Eyes: Pipe the yellow melting chocolate inside each oval. Let it sit for 2–3 minutes to dry slightly.
- Add Details: Pipe a small “U” shape in the center of each yellow oval, then immediately outline the oval with black chocolate. Let the chocolate sit for another 2–3 minutes to dry.
- Add the Eyebrows: Using the same black chocolate, pipe the Grinch’s fluffy eyebrows above each eye. To do this, start above the yellow ovals and draw a curved, wiggly line — the bigger the wiggles, the better!
- Add the Nose: Pipe a small black circle in the middle of each cookie, just below the eyes, to represent the Grinch’s nose. Let the cookies sit for about 3 minutes to dry completely.
- Serve and Enjoy: Once the chocolate is firm, your Grinch Nutter Butter Cookies are ready to serve! Arrange them on a platter, gift tray, or holiday dessert board.
Notes
- If chocolate gets too thick, add ½ teaspoon of coconut oil to thin it.
- These Grinch eye nutter butter cookies can be stored in an air tight container in a cool dry place for 2-3 days.
- To add a bit more detail to your Grinch’s eyes, you can use the toothpick to drag some of the wet black chocolate under the eyes to give the appearance of bags.
- Some images show the Grinch with a bit of red in his eyes so you can add that to these cookies. Also make each eyebrow different to represent different facial expressions.
- Prep Time: 40 minutes
- Category: Christmas Treats, Snacks
- Method: No-bake
- Cuisine: American
Nutrition
- Serving Size: 1
- Calories: 215 kcal
- Sugar: 19 g
- Sodium: 120 mg
- Fat: 12 g
- Saturated Fat: 7 g
- Carbohydrates: 26 g
- Fiber: 1 g
- Protein: 3 g
- Cholesterol: 0 mg