Valentine’s Day Cake Pops — Easy, Fun & Gift-Ready
If you’re looking for a cute and easy treat to make this February, these Valentine’s Day cake pops are the perfect choice. They’re fun to decorate, simple to customize, and way easier than they look, especially with this beginner-friendly cake pop recipe. Whether you’re making homemade Valentine treats for a classroom party, a work event, or a date-night dessert, these chocolate-dipped cake pops always impress.
You can use a boxed cake mix or your favorite homemade cake, and I’ll walk you through how to roll, chill, dip, and decorate them so they turn out smooth and festive every time. These little pops travel well, store beautifully, and make the sweetest addition to any Valentine’s dessert spread.
────────────────────────────────
QUICK RECIPE SNAPSHOT 💘
────────────────────────────────
⏱️ Total Time: ~2 hours (includes chilling)
👩🍳 Skill Level: Beginner
🎂 Main Ingredient: Cake + frosting
🍰 Key Carb: Cake crumbs
🍡 Servings: ~20 pops
🧁 One-Pot or Multi-Pot: Multi-step
💝 Perfect For: Valentine’s, gifting, parties
Why These Cake Pops Are Perfect for Valentine’s
- Fast + festive: Look bakery-beautiful with simple dipping and sprinkles.
- Flexible: Works with homemade cake or a boxed mix — both turn out great.
- Kid-friendly: Rolling, dipping, and decorating are easy jobs for little helpers.
- Perfect for sharing: Great for classroom parties, Galentine’s, office treats, or neighbor gifts.
- Make-ahead magic: Bake, roll, and chill ahead of time; dip when you’re ready.
- Travel-friendly: Sturdy pops that hold up well in lunchboxes, gift bags, or party trays.
- Beginner-approved: Simple steps, no special tools, and Nana-tested tips for success.
Ingredients & Equipment You’ll Need
Ingredients
- 1 cake mix (9×13 inch), baked and cooled: Any flavor you like; yields about 3–4 cups crumbled cake.
- 1 tub (15.6 oz) Betty Crocker ready frosting: Choose a flavor that pairs well with your cake.
- 20 lollipop sticks: Standard 4″–6″ cake pop sticks work well.
- 12 oz white chocolate chips (or melting white chocolate): Used for dipping and coating the pops.
- Pink or red food coloring: Tint the melted white chocolate for Valentine’s colors.
- Heart-shaped chocolates or icing: For easy decorative toppers.
- 2 tbsp sprinkles of your choice: Valentine-themed sprinkles add instant charm.
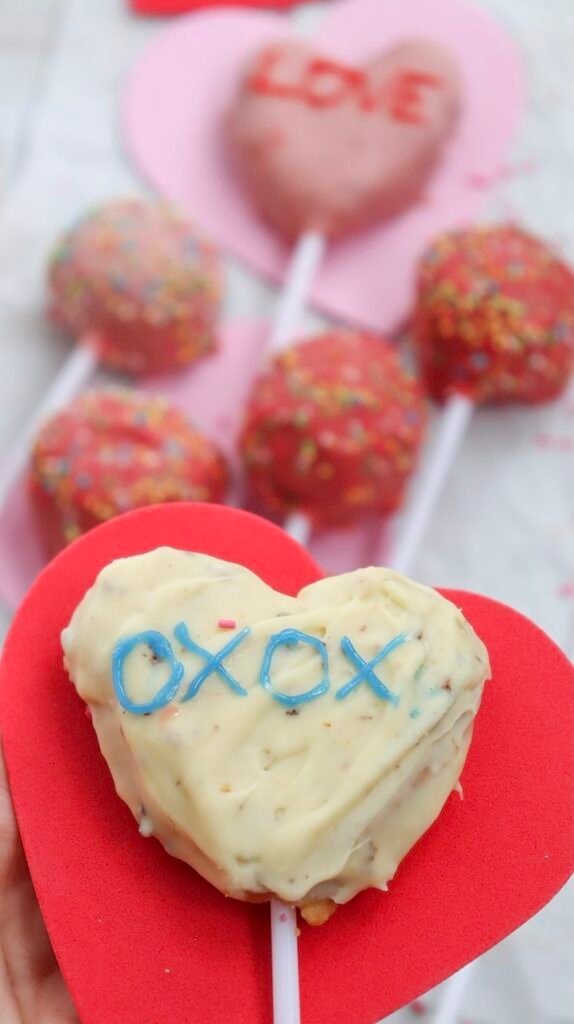
- Writing icing (optional): For adding letters, hearts, or swirl details once set.

Equipment
- Large mixing bowl
- Baking sheet lined with parchment
- Microwave-safe bowl for melting chocolate
- Cookie scoop (helps with even sizing)
- Styrofoam block or stand for drying cake pops
How to Make Valentine’s Day Cake Pops
After a few rounds of making these, I’ve learned that white chocolate needs occasional reheating, heart shapes take a little extra patience, and boxed cake works just as well as homemade. Also—kids plus sprinkles? Chaos, but the fun kind.
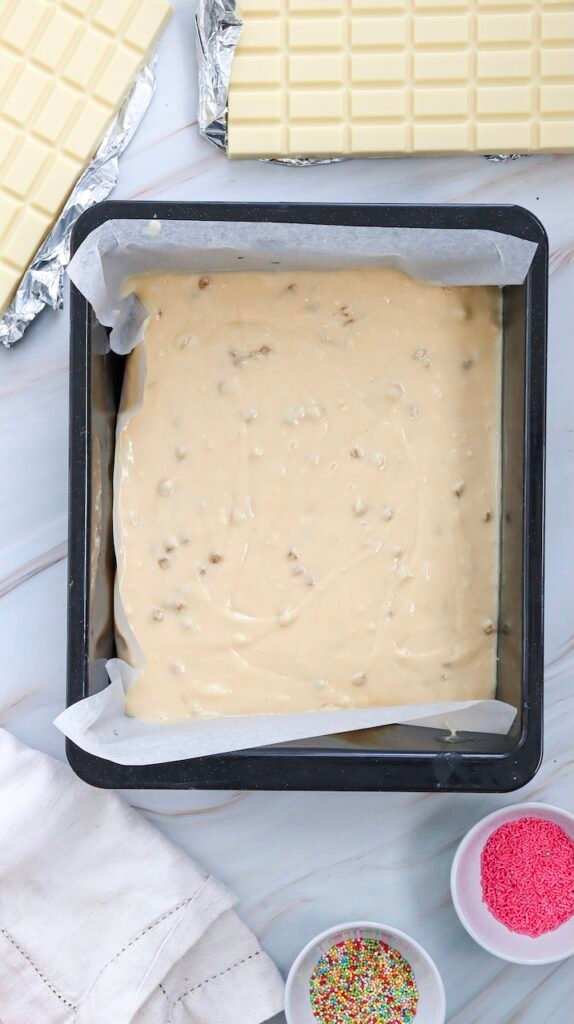
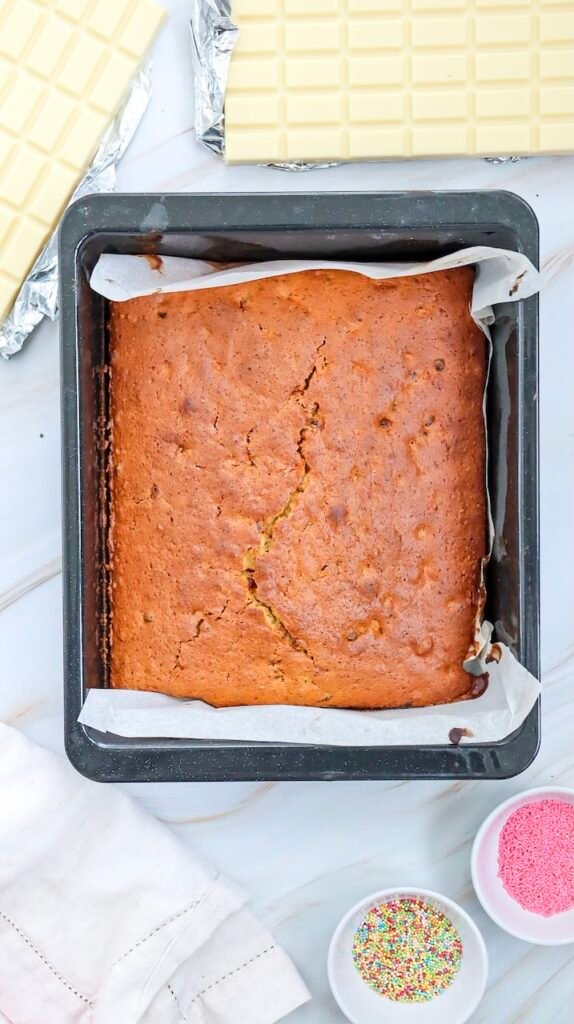
Step 1. Bake the Cake: First, bake a cake according to the package instructions or your favorite recipe. Allow it to cool completely.
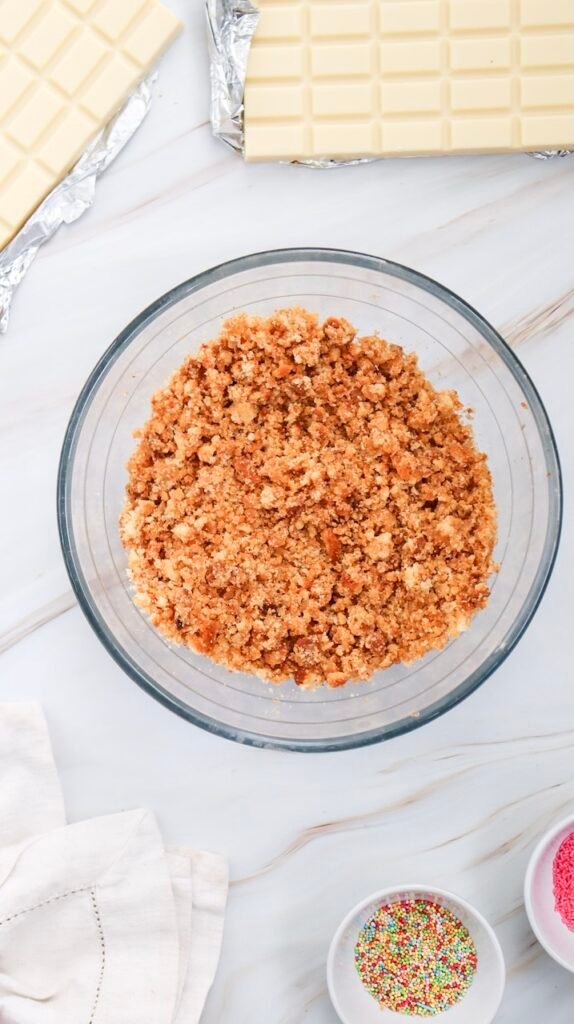
Step 2. Crumble the Cake: Once the cake is cool, crumble it into a large mixing bowl. Make sure it is fully broken down with no large pieces remaining.
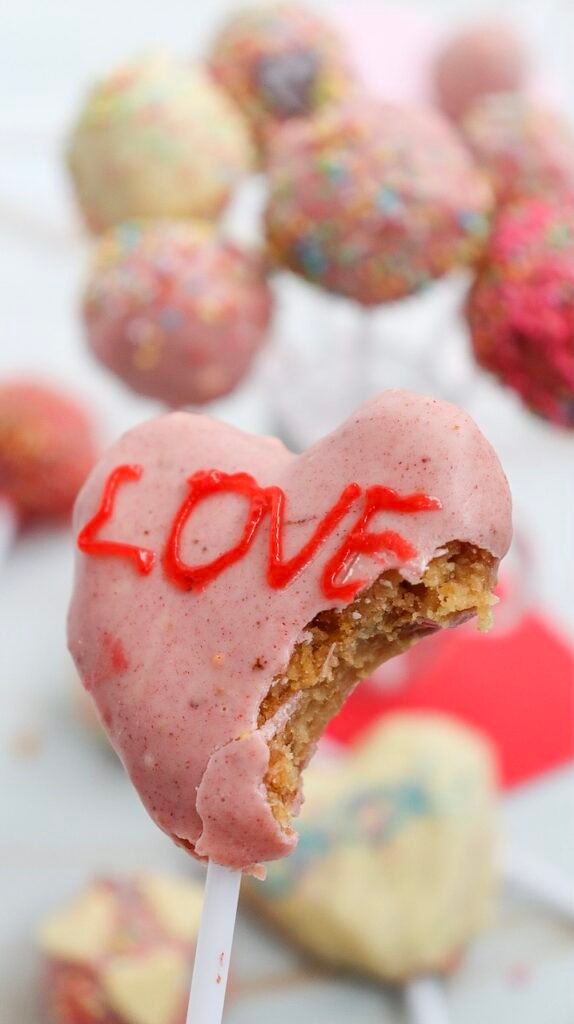
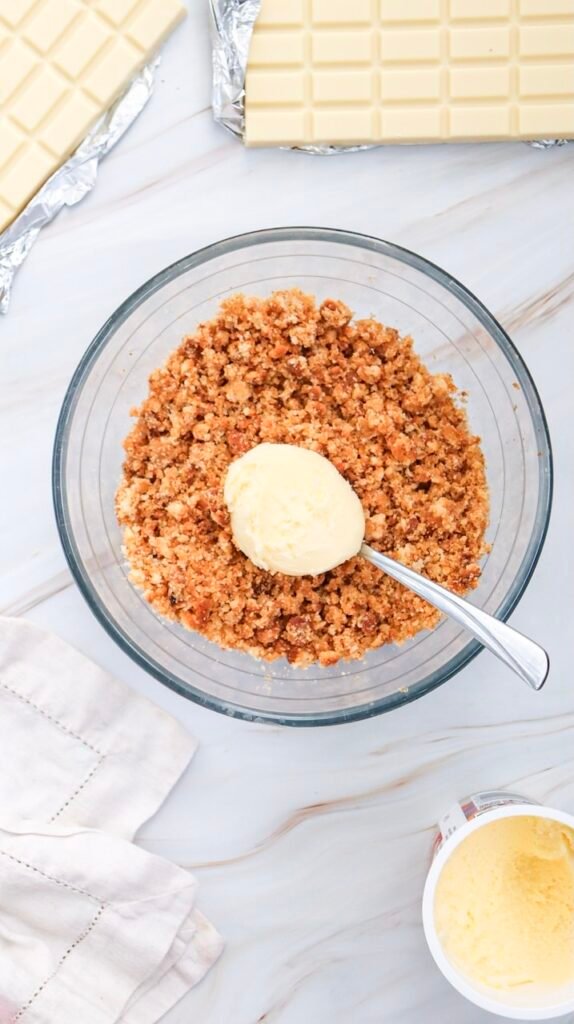
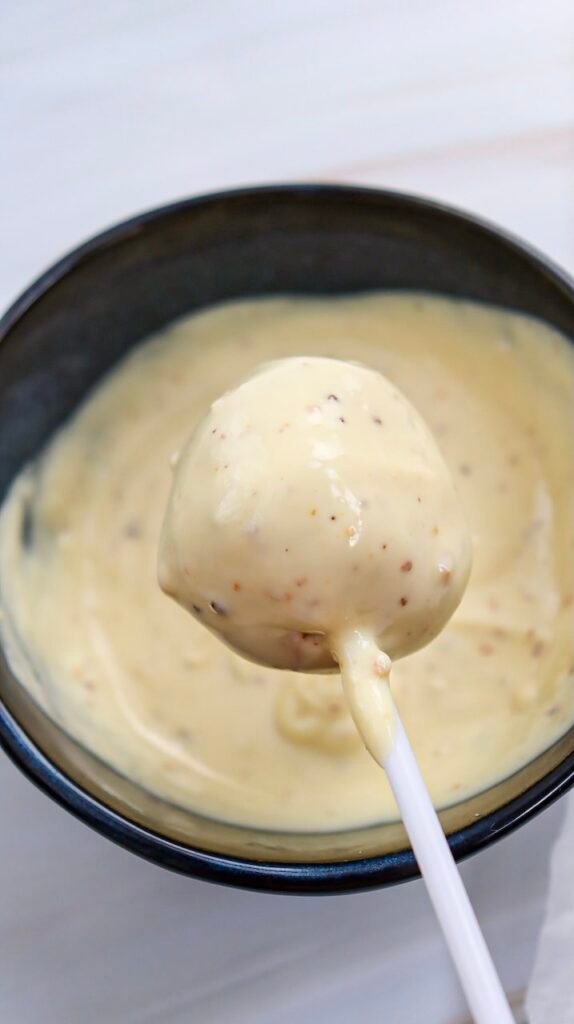
Step 3. Mix with Frosting: Add the entire tub of Betty Crocker frosting to the crumbled cake and mix until a dough forms that holds together. Roll the mixture into about twenty 1-inch balls, shaping some into hearts if you’d like.
Place all the cake balls on a parchment-lined baking sheet and refrigerate for 30 minutes to firm up. Melt about 1 oz of white chocolate and dip the end of each lollipop stick into it before inserting the stick into the center of each cake ball to secure it. Return the cake balls to the parchment-lined sheet and refrigerate again for about 60 minutes to firm up fully.

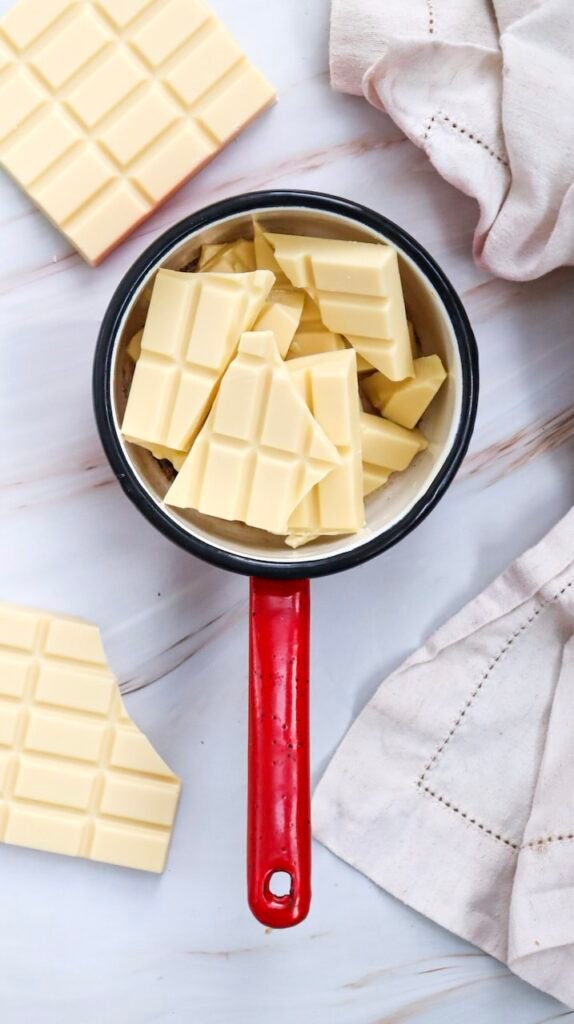
Step 4. Melt White Chocolate: In a microwave-safe bowl, melt the remaining 11 oz of white chocolate according to the package instructions until smooth, heating in 30-second intervals and stirring in between to prevent burning.
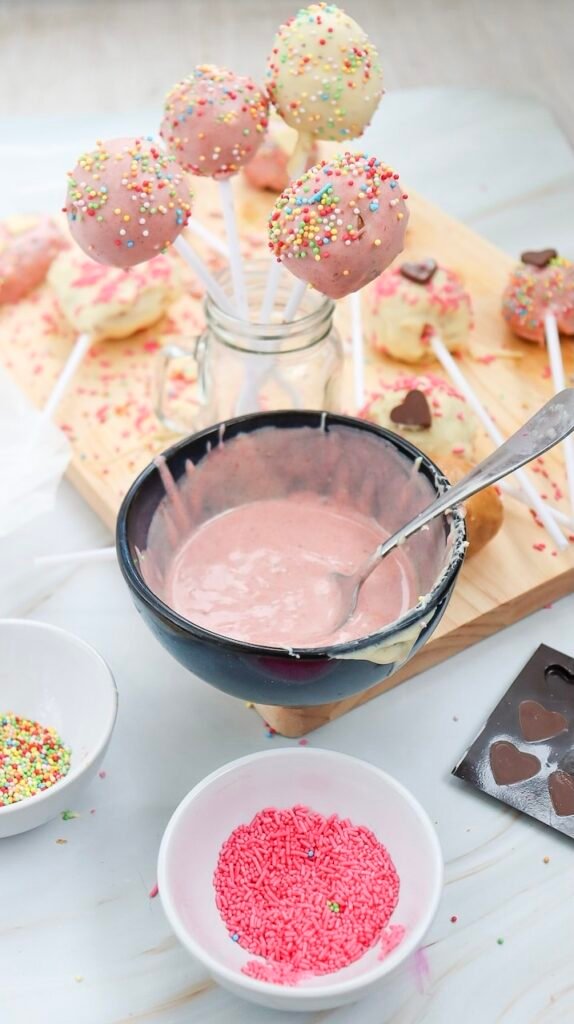
Step 5. Color the Chocolate: Divide the melted white chocolate into two bowls. Leave one bowl plain for white chocolate pops and add pink food coloring to the second bowl, mixing until you reach your desired Valentine’s shade.
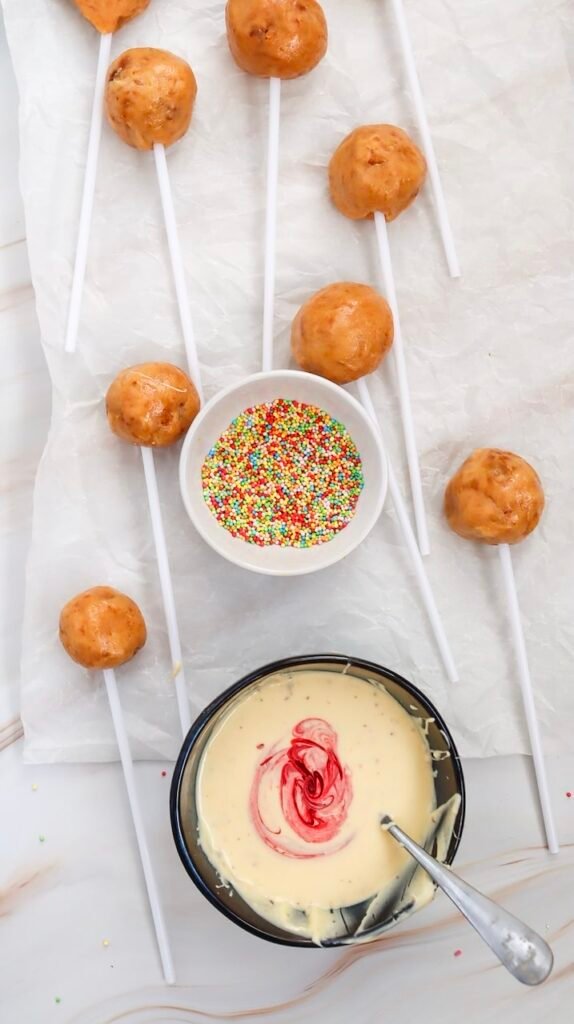
Step 6. Dip the Cake Pops: Dip some of the cake pops into the plain melted white chocolate, making sure each one is fully coated. Dip the rest into the pink chocolate, again coating them completely and allowing any excess chocolate to drip off.
Step 7. Cool the Cake Pops: Place the dipped cake pops back on the lined baking sheet and allow them to cool completely at room temperature, or chill them in the fridge for 15 to 30 minutes, until the chocolate has fully hardened.
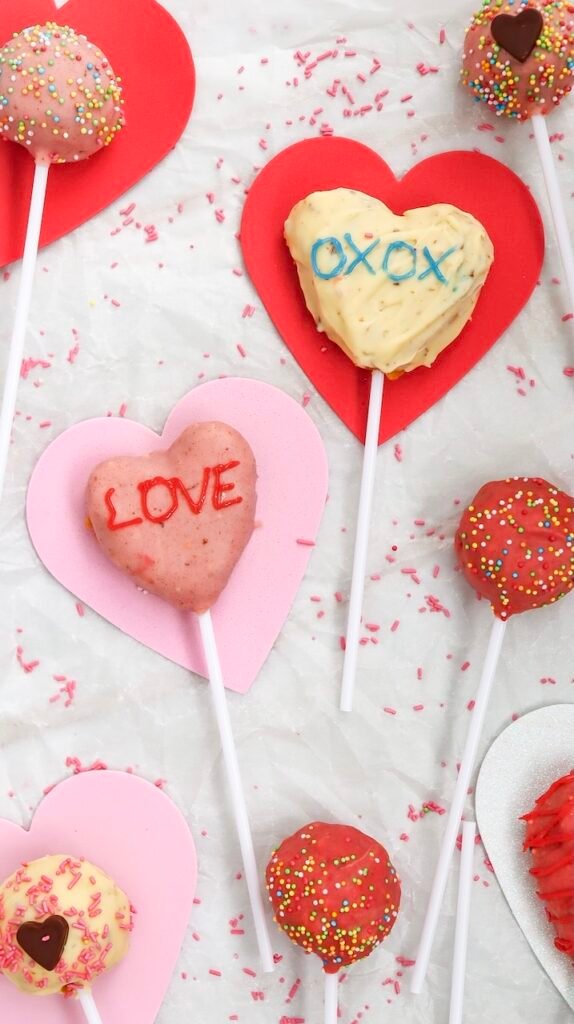
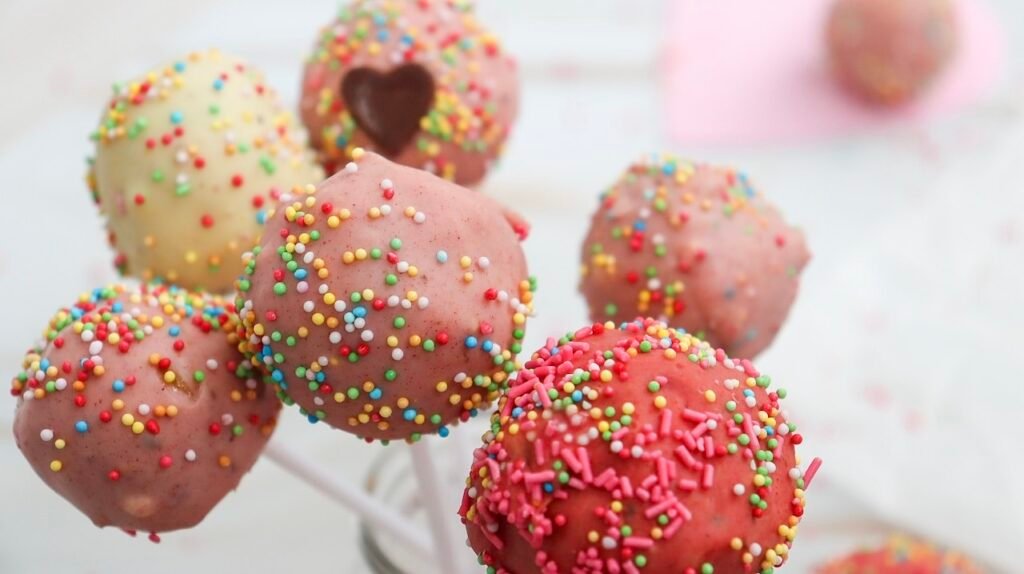
Step 8. Decorate: Once the coating is set, decorate the pops with heart-shaped mini chocolates, sprinkles, or writing icing. Add little messages, patterns, or details to make them personal and festive.

Helpful Tips for Perfect Valentine’s Cake Pops
Flavor & Variation Ideas
- Red Velvet + Cream Cheese: Classic Valentine’s combo with rich, tangy flavor. Looks striking when dipped in white chocolate and topped with red heart sprinkles.
- Strawberry Cake + Strawberry Frosting: Naturally pink and fruity. Great option if you want bright Valentine color without extra dye.
- Chocolate Lovers: Deep, fudgy chocolate-on-chocolate. Dip in white chocolate and drizzle with milk or dark chocolate for contrast.
- Gluten-Free / Dairy-Free Option: Use gluten-free cake mix and dairy-free frosting. Dip in dark chocolate or a dairy-free white chocolate alternative.
- Cake Balls (No Stick): Roll slightly larger balls and set them in mini cupcake liners. Easier to make and perfect for gift boxes or dessert trays.
- Seasonal Color & Theme Variations
- Galentine’s: Pink coating + gold sprinkles.
- Spring: Pastel-tinted coatings (lavender, mint, blush).
- Christmas: White chocolate pops with red swirled drizzle.
Storage, Make-Ahead & Gifting
Storage
- Fridge: up to 5 days (airtight): Keep cake pops in a sealed container so the chocolate coating stays crisp and the cake inside stays moist.
- Freezer: up to 6 weeks (freezing the undecorated cake balls is best): Freeze the cake balls before dipping—this gives you fresher pops and smoother coating later.
- Thaw at room temperature before coating: Let frozen cake balls sit 20–30 minutes so they don’t crack the chocolate from temperature shock.
Make-Ahead Strategy
- Prep cake balls on the weekend: Roll, shape, insert sticks, and chill or freeze so they’re ready whenever you need them.
- Dip & decorate on Valentine’s morning (or any time you have a few minutes): Freshly dipped pops look the best, and decorating right before gifting keeps colors bright and sprinkles crisp.
Gifting & Presentation Ideas
- Wrap individually with cellophane + ribbon: Perfect for classroom parties, coworkers, or neighbor treats.
- Arrange in a mug or jar filled with candy hearts: Turns the pops into a cute edible centerpiece or teacher gift.
- Create a cake-pop bouquet using floral foam: Stick pops into foam inside a small vase or basket for a Valentine’s bouquet effect.
- Pack in gift boxes with paper crinkle fill: Great for transporting multiple pops safely while keeping them festive and presentable.
Common Mistakes & How to Fix Them
- Cracking after dipping: When cold cake balls meet warm chocolate, the coating can split as it sets. Let the chilled cake balls rest at room temperature for 10–15 minutes before dipping to reduce the temperature shock.
- Coating turning thick or streaky: White chocolate cools and thickens fast. If the coating starts to look dull, clumpy, or heavy, rewarm it in 5–8 second bursts and stir well. Smooth, warm chocolate gives the cleanest finish.
- Sprinkles not sticking to the coating: Sprinkles and small décor need to be added when the coating is still wet and glossy. If the chocolate has already begun setting, decorations will slide or fall off. Work in small batches to keep the timing right.
Valentine’s Day Cake Pops FAQ
More Valentine Treats to Check Out

Festive Valentine Cake Pops
- Total Time: 1 hour 15 minutes
- Yield: 20 1x
Description
These Valentine’s day cake pops are soft, sweet, and dipped in pink and white chocolate for a festive finish. Made with a simple cake mix, ready-made frosting, and melted white chocolate, they’re easy enough for beginners and fun to decorate. Perfect for gifting, parties, or sharing with someone special.
Ingredients
- 1 cake mix (9×13 inch), baked and cooled (any flavor; about 3–4 cups crumbled)
- 1 tub (15.6 oz) Betty Crocker ready frosting
- 20 lollipop sticks
- 12 oz white chocolate chips (or melting white chocolate)
- Pink or red food coloring
- Heart-shaped chocolates or icing
- 2 tbsp sprinkles
- Writing icing (optional)
Instructions
- Bake the Cake: Bake a cake according to package instructions or your favourite recipe. Let it cool completely.
- Crumble the Cake: Crumble the cooled cake into a large mixing bowl, breaking it down fully with no large pieces.
- Mix with Frosting: Add the entire tub of frosting to the crumbled cake and mix until a dough forms. Roll the mixture into about twenty 1-inch balls, shaping some into hearts if desired. Place them on a parchment-lined baking sheet and refrigerate for 30 minutes. Melt about 1 oz of white chocolate, dip the end of each lollipop stick into it, and insert into each cake ball. Return them to the baking sheet and refrigerate for 60 minutes to firm up.
- Melt White Chocolate: Melt the remaining 11 oz white chocolate in a microwave-safe bowl, heating in 30-second intervals and stirring between each until smooth.
- Color the Chocolate: Divide the melted chocolate into two bowls. Leave one plain and tint the other with pink food colouring until you reach your desired shade.
- Dip the Cake Pops: Dip some cake pops into the plain white chocolate and the others into the pink chocolate, letting excess coating drip off.
- Cool the Cake Pops: Place the dipped cake pops back onto the parchment-lined baking sheet to cool at room temperature or chill 15–30 minutes until the coating hardens.
- Decorate: Once set, decorate with heart-shaped chocolates, sprinkles, or writing icing. Add messages or designs to personalize them.
Notes
- Chill time ensures smooth dipping and helps pops hold their shape.
- Heart shapes add a festive touch for Valentine’s Day.
- Prep Time: 30 minutes
- Cook Time: 45 minutes
- Category: Dessert | Holiday Treats
- Cuisine: American
Nutrition
- Serving Size: 1
- Calories: 210 kcal
- Sugar: 20 g
- Sodium: 160 mg
- Fat: 10 g
- Saturated Fat: 5 g
- Carbohydrates: 28 g
- Fiber: <1 g
- Protein: 2 g